Of course, as with many Roblox experiences, there is indeed a codes section I would recommend taking advantage of as you can use the codes for things such as the gumball machines for receiving pets. This article will take you through all of the Tower of Ball Roblox codes.
All Tower of Ball Codes List
Listed below is every Tower of Ball code that has made its way to the experience. I recommend redeeming any working codes as soon as possible before they expire so you don’t miss out. It can be very easy to forget to redeem a code and then not have the reward.
Tower of Ball Codes (Working)
- Like40KTOB — You will get $4000 cash in total.
Tower of Ball Codes (Expired)
- 20KLikeTOB — This previously provided players with $2000 cash before expiring.
Related: Zone Rush Codes
How to Redeem Codes in Tower of Ball
Follow the instructions below to redeem codes in Tower of Ball.
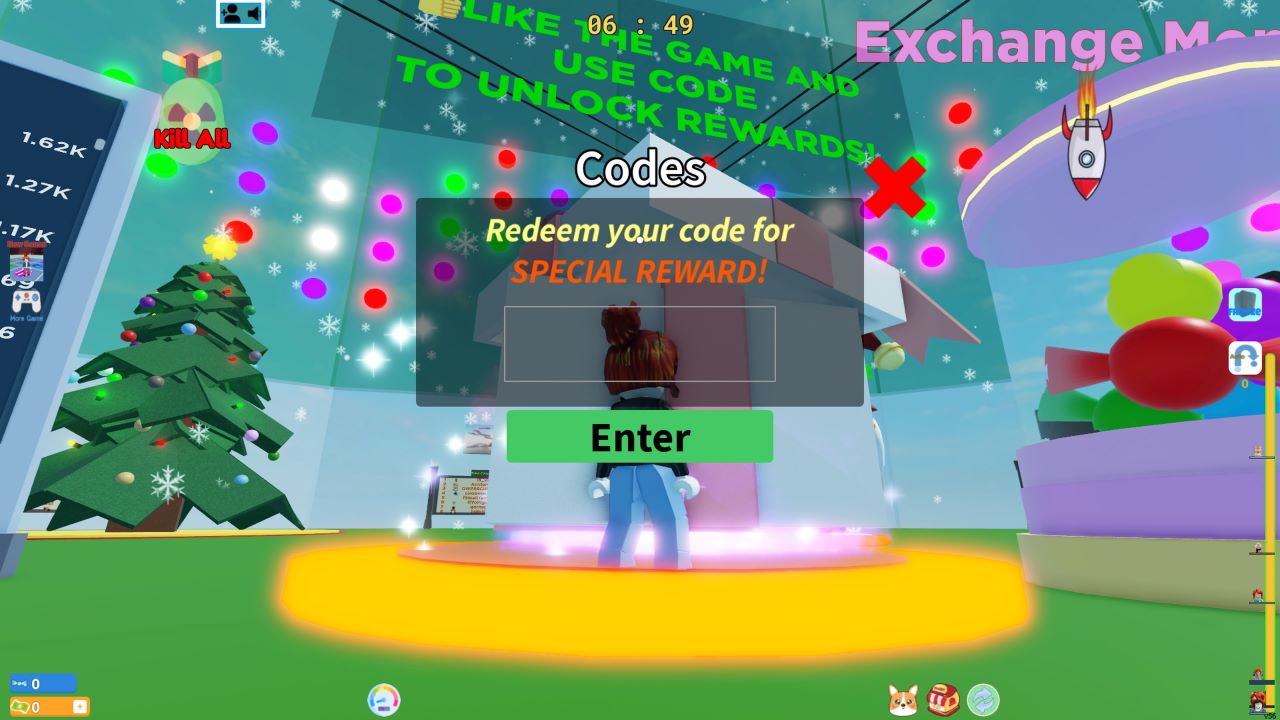
- Launch Tower of Ball on Roblox.
- Make your way into the central lobby area to the white and pink present (if colorblind, it has a mention of “codes” in the text box above).
- When close to the present, the code redeem box will pop up — if it doesn’t, interact with the present instead.
- Enter a working code into the box and click/press enter to redeem.
- Repeat as necessary for other working codes.
How Can You Get More Tower of Ball Codes?
The best way to keep track of Tower of Ball codes is on the main game page. This is because the developers don’t currently have a main social media presence, which is usually the most effective for code tracking.
At the time of writing, there is a new code already planned for when the experience reaches 88,000 likes.
Why Are My Tower of Ball Codes Not Working?
If Roblox isn’t down in any way and your codes are still not working, it could be a sign that the codes you are trying to redeem have expired or are potentially mistyped. Codes can change on a fairly frequent basis in experiences, so it is important to keep that in mind. We will update this article as soon as possible with new working codes whenever there are more.
Related: Play for UGC Codes
Other Ways to Get Free Rewards in Tower of Ball
The Random Reward chest in the lobby area is an excellent way, in my opinion, to get more free rewards without any codes. You can get gear like new trails from the chest. It is very hard to miss the chest in the main area as it looks exactly like a treasure chest and is large. There will be a timer counting down above the chest which indicates when you can go up and claim a free reward once it has finished.
What is Tower of Ball?
As mentioned before, Tower of Ball is all about navigating along tracks with a ball and you can race other players while doing so. There are an array of maps on offer for you to get better at over time. With pets, trails, and more to collect, this experience can easily hook you. I have noticed that the Robux purchase pushing is apparent in this experience, so be sure not to fall prey to spending more than you would like to.
Now that you know the working codes for Tower of Ball in Roblox, you can dive back into the rolling fray and claim some great free rewards.
]]>Full Release Date of Enshrouded
Enshrouded has no confirmed full release date as of yet but the developers have stated on Steam that they have a goal set to “take the game out of Early Access within a year.” This means that for the time being, a full release could be likely nearer the end of the year or in early January 2025. This is all speculation however so it is best to keep up to date with the developers via their announcements section.
Early Access, even though not a full release, will have more than enough to keep you going while there is a wait for the main launch. Personally, one aspect of the Early Access which I hope will adjust over time is the max level as it is currently capped at 25. Apart from that though, there are plenty of resources you will be spending time collecting, Elixir Wells to clear, and much more.
Will Enshrouded Be on Game Pass?
Enshrouded is set to receive both a PlayStation 5 and Xbox Series X/S version in the future though the exact details of these releases are not clear either. The console versions will (very likely) be after the main release though since Steam is the only platform with Enshrouded in Early Access. It is not known whether or not Enshrouded will be put on Game Pass like many other titles at the Xbox launch.
Now that you know a general time range of the Enshrouded full release date, you can get back to exploring the vast world and foraging plenty of Rooibos as you go along.
]]>Where to Find Rooibos in Enshrouded
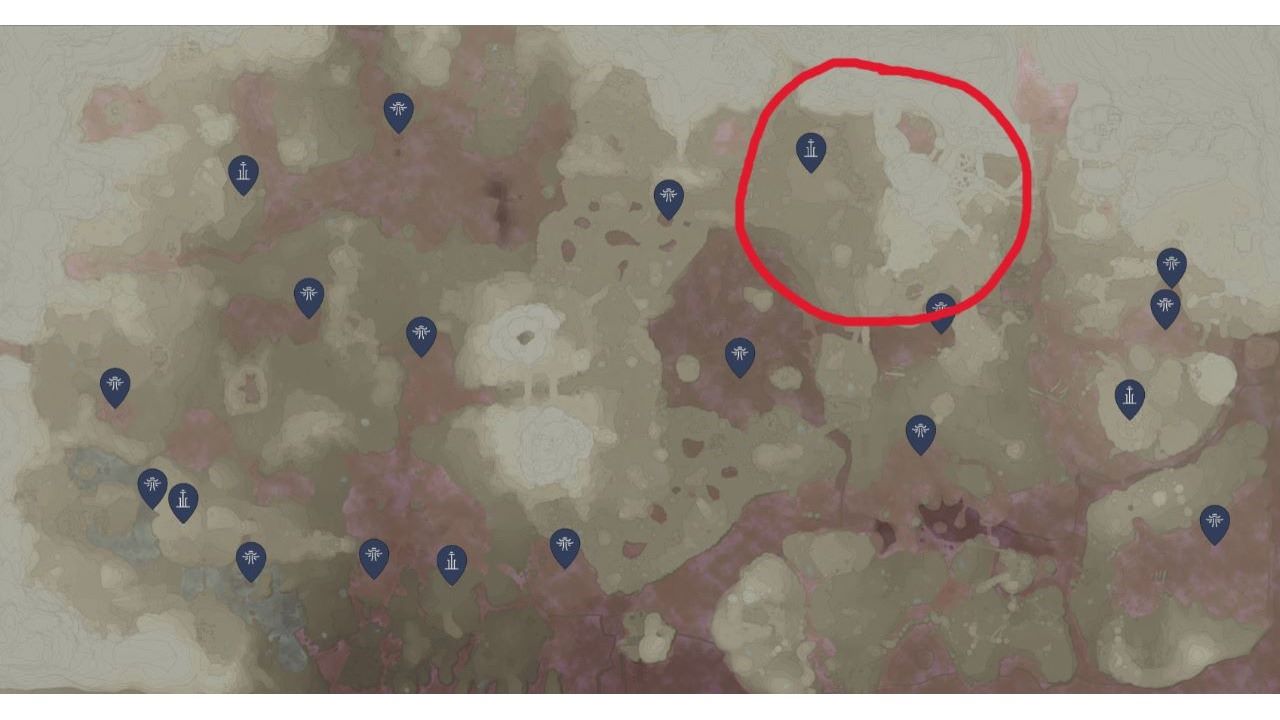
Rooibos can be found throughout the Nomad Highlands easily and in particular, I recommend searching around the portion of the map I have circled below. This is where players are finding success in getting plenty of the stuff quickly as a lot of it is lying around. Since the Nomad Highlands is close to the northeast of the map, it will take you a bit of time to get over there.
Similar to a simple resource like Plant Fiber, you will be collecting Rooibos the most from a certain plant/bush. The plant in question is tall and stem-like. It has yellow flowers dotted around on the stems and if you are colorblind the best way to describe these flowers is that they have four petals and contain a small indented middle section. When you are in the Nomad Highlands, if you’re going around and gathering from various bushes and plants, you will have plenty of this resource in no time. For each harvest, you will get one to three Rooibos.
General smaller normal green shrubs also can give Rooibos in the Nomad Highlands, but only one per harvest. For an example of what both plants look like, this video by TipSeerch is useful.
Once you have some Rooibos, you can also craft the seedlings for the plant from your Seedbed if you have one. You need Water, Fossilized Bone Dust, and at least one piece of Rooibos. When you have Rooibos seedlings, you then can plant them in the soil of your farming field/land, and that way you can have a steady stream of extra Rooibos.
What Can Rooibos Be Used for in Enshrouded?
The main use for Rooibos at the time of writing is thought to be for a Rooibos Tea recipe. However, players have been finding this recipe difficult to discover. Some places mention in a wiki-like format the recipe existing and the bonuses it provides like a boost in Endurance and Stamina Recharge upon drinking. Though actual data is low so keep in mind that you may not find any recipe for a while to use with Rooibos.
Now that you know how to get Rooibos in Enshrouded, you can dive back into the game and start stocking up on this plant before you get back to clearing out Elixir Wells with ease.
]]>This article will take you through how to set up a dedicated server for Enshrouded and the best settings you can use.
- How to Set Up a Dedicated Server for Enshrouded
- How to Connect to a GPortal Dedicated Server in Enshrouded
- Is It Possible to Set Up a Dedicated Server For Enshrouded for Free?
How to Set Up a Dedicated Server for Enshrouded
To create a dedicated server for Enshrouded, I highly recommend using GPortal since it is the officially mentioned server hosting platform for the game. When you are in the “Join” section of Enshrouded, you will notice it prompting you to go to GPortal if you would like your own dedicated server as you might have in games like Valheim. It will cost you $5.50 for 30 days if you want four (player) slots.
Go to the GPortal website and navigate to the Enshrouded page. When you are there, choose whichever package works best for you. If you’re just looking to play with a few of your friends then the four slots will work the best cash-wise to keep things cheap. The slots just mean how many players can be on the server at the same time. Buy the server you’d like and then on the page it takes you to, click “Basic Settings” on the side.
Best Enshrouded Dedicated Server Settings
There isn’t too much you will have to adjust for the Enshrouded dedicated server settings, keeping them the way they are out of the box will work. However, you should change the server name and set up a server password so your server is secure. This is all done through the Basic Settings page.
One thing you should also do is go to the “Restarts” section and then type in a description for the server restart: set it to midnight, save, and then now your server will restart each day. Along with this, be sure to use the “Backups” section and add a manual backup, and activate automatic backups.
How to Connect to a GPortal Dedicated Server in Enshrouded
Once you have a GPortal server bought and activated, you can join it in Enshrouded easily by searching for your server name in the Join option of the menu after pressing “Play” in the game.
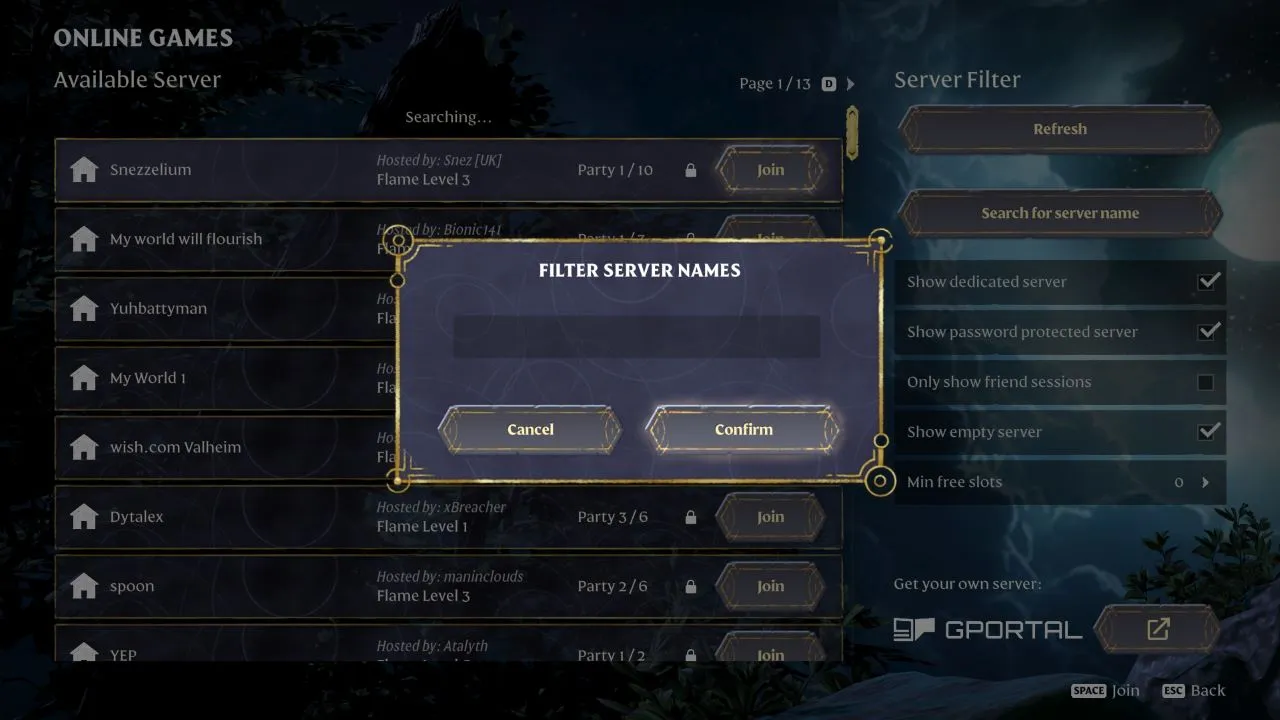
Click “Search for server name” and then you can search for your server. When you have done so, simply press ‘Join’ on the server and you can start playing on the dedicated server.
Is It Possible to Set Up a Dedicated Server For Enshrouded for Free?
Yes, you can make your very own dedicated server for free but it will take a lot more work. I would recommend watching the following video by TroubleChute for an exact process of how to do this. It will save you money in the long run but there is more you will have to do on the back end to make everything run smoothly.
Now that you know how to set up a dedicated server in Enshrouded, you can get back to the game and begin foraging for plenty of Plant Fiber, weapons, and more all through your own server.
]]>This article will take you through how to get Plant Fiber in Enshrouded and add even more of this vital resource to your inventory.
Where to Find Plant Fiber in Enshrouded
Plant Fiber can be found all throughout the world of Enshrouded similar to other materials and looking around wooded areas has always been the best way to get the resource for me in abundance. The Plant Fiber itself can be harvested from bushes and tall stem-like plants. Whenever you “Collect” from most bushes, you will get around 2-3 Plant Fibers per collection.
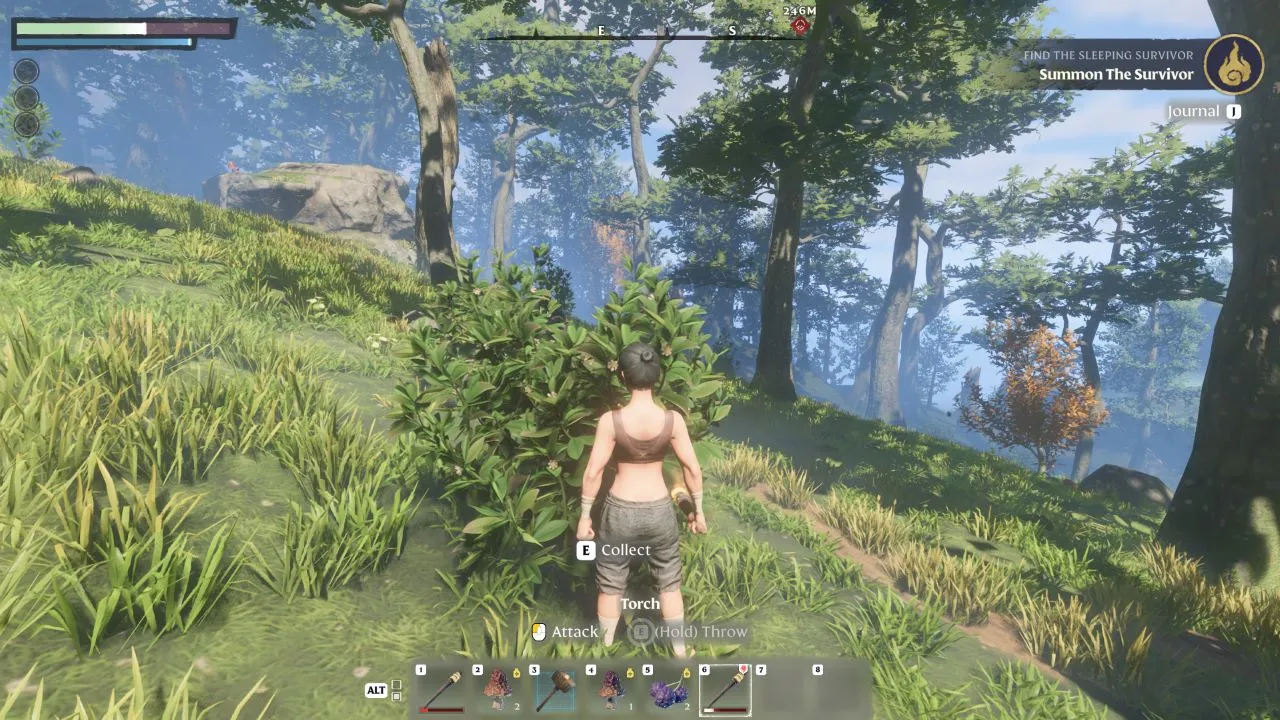
However, you need to be careful as you will stumble across certain bushes that have larger berries on them (they are purple) and these bushes will reward you only with Purple Berries and no plant fiber. I have personally found the best way to tell if a bush will give you Plant Fiber is if it does not say “Harvest”. Whenever there is any mention of Harvest, you probably won’t get any Plant Fiber from it.
What Is Plant Fiber Used For in Enshrouded?
You will be using Plant Fiber for crafting String the most which is used in many recipes throughout your entire journey, from workbenches to grappling hooks, you need as much string as possible. Not only that but even bandages that you can use for healing yourself require one piece of String.
This is why (especially in the early game) you should be collecting every bush and shrub you see so you can get plenty of Plant Fiber without having to go out on extra hunting runs. That way you’ll always have enough of the stuff when you need to craft something important.
Now that you know how to get Plant Fiber easily in Enshrouded, you can rush back into the world and start foraging this key resource for yourself.
]]>This article will take you through exactly what the max level is in Enshrouded for your characters.
Max Level Cap in Enshrouded
The max level you can get to in Enshrouded is level 25, at which point you will be capped for the time being until any future updates are made. You might be confused by this like I was, as there are enemies higher than 25. All in all, though, this will make the later game experiences more rewarding because of the extra challenge.
While you’re leveling up/exploring, you will be able to make use of the skill tree along the way, and this will assist you in having a much more fleshed-out and capable character, to face Enshrouded’s many challenges. This, of course, goes hand-in-hand with having the best weapons, such as the Aerostriker mace or the Draconian Bow.
It will still take you a little while to achieve the max level of 25, so you won’t be running short on anything to do in the game too soon. There are plenty of times, too, when you will need to get to grips with the most efficient ways to stay alive, which adds extra enjoyment and strategy planning.
Will the Level Cap Increase in Enshrouded?
It is unknown at the time of writing if the level cap will increase, but given the fact the game is in Early Access, I would think it highly probable that the cap will go up over time. For this now, you can focus on progressing through the game at your own pace, clearing elixir wells, setting up bases, and much more, all while having your sights set on the current 25 cap.
Now that you know what the max level cap is in Enshrouded, it’s time to plunge yourself back into the shroud and defend against the brutal enemies awaiting you.
]]>This article will take you through how to fix the No Compatible Graphics Device Found error for Enshrouded.
Fixing the No Compatible Graphics Device Found Error for Enshrouded
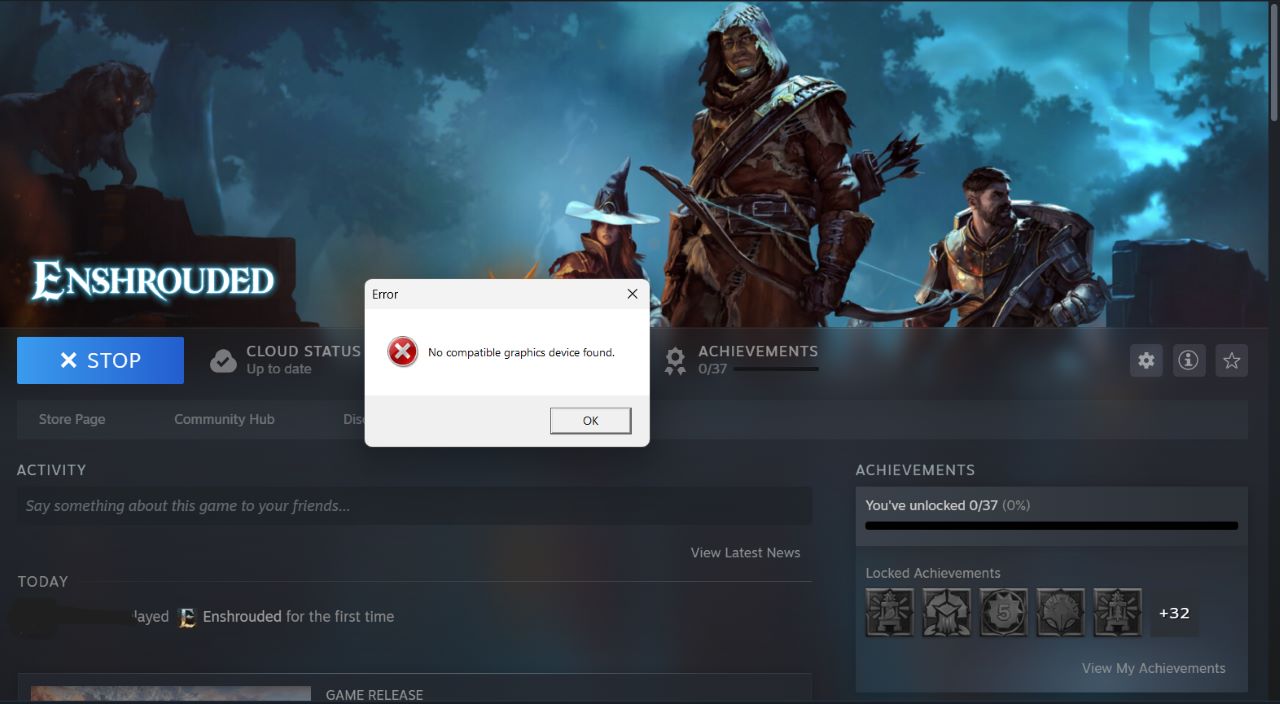
If you are trying to start the game from Steam and have an error pop up with the text shown like it is above, then you aren’t alone. I have a speedy way for you to fix the Graphics Device error without many issues. First of all, you will want to make sure that you are meeting the minimum Graphic Card requirements for Enshrouded, which are as follows as listed on Steam.
- NVIDIA GeForce GTX 1060 (requires 6GB VRAM) / AMD Radeon RX 580 (requires 6GB VRAM)
If you have a graphics card higher than those, then you will just need to update your graphics drivers on your PC/Laptop to fix the error. For those with NVIDIA drivers, you can do this through the “GeForce Experience” app. Go into the app, then click on the “Drivers” text on the top banner. You should see a Driver update along with an “Express Installation” option when you have done so. Select this and then proceed to update your Game Ready Driver.
Once it is complete, simply go back to Steam and try to launch the game again — I found it to work on the first try after the update.
NVIDIA Game Ready Driver Installation Error | How to Fix
For those trying to update their NVIDIA Game Ready Driver, you may run into an issue, which is that during the update, there could suddenly be an error near the end. If this happens, do not worry and close the panel that appears. Try another update run of the Driver and see if it stops the error — if it doesn’t, then close down the GeForce Experience app and then go back into it.
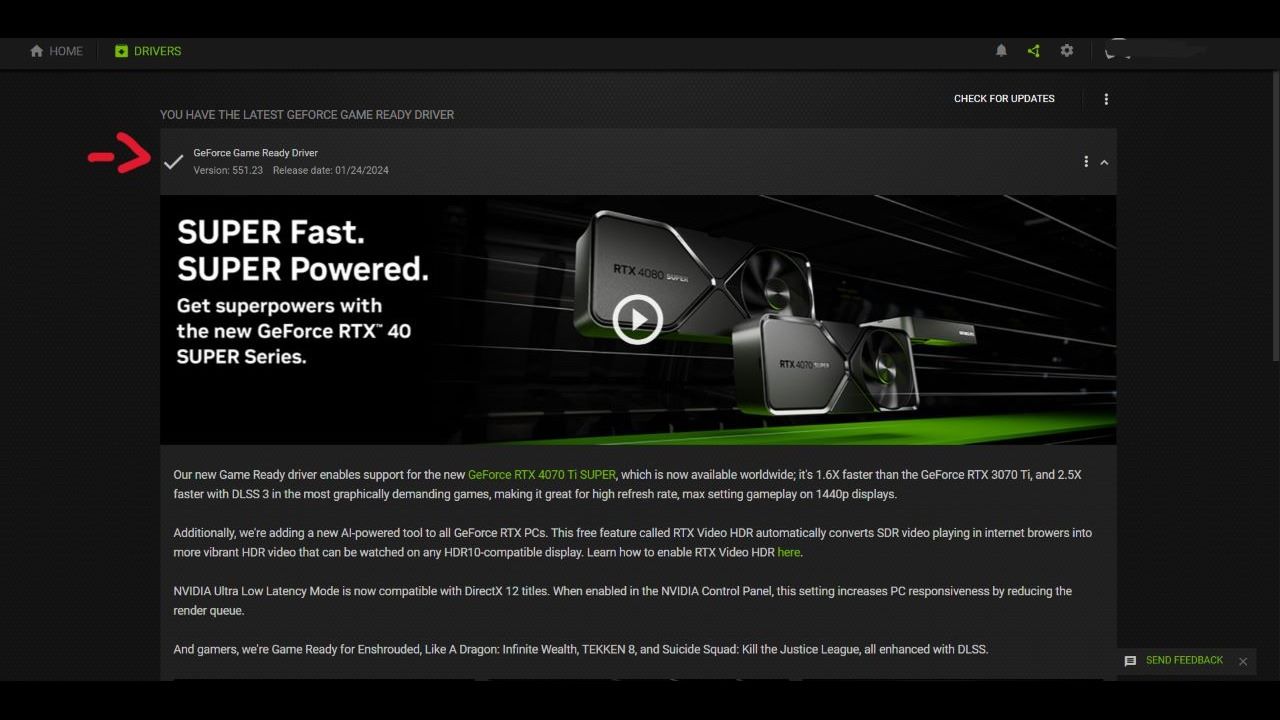
Once you are back in and at the Drivers section, it should say at the top “You have the latest GeForce Game Ready Driver” along with a tick next to the recently updated driver. If it does, then you are ready to go back to Steam and try to launch Enshrouded again. There seems to be a glitch with the NVIDIA app where it mentions an error happens, but it hasn’t. This means that your updated driver is already sorted.
Now that you know how to fix the No Compatible Graphics Device Found error, you can get busy preparing your character for the world of Enshrouded.
]]>This article will take you through the full roadmap details of Palworld, letting you know what to expect.
Full Palworld Roadmap Explained
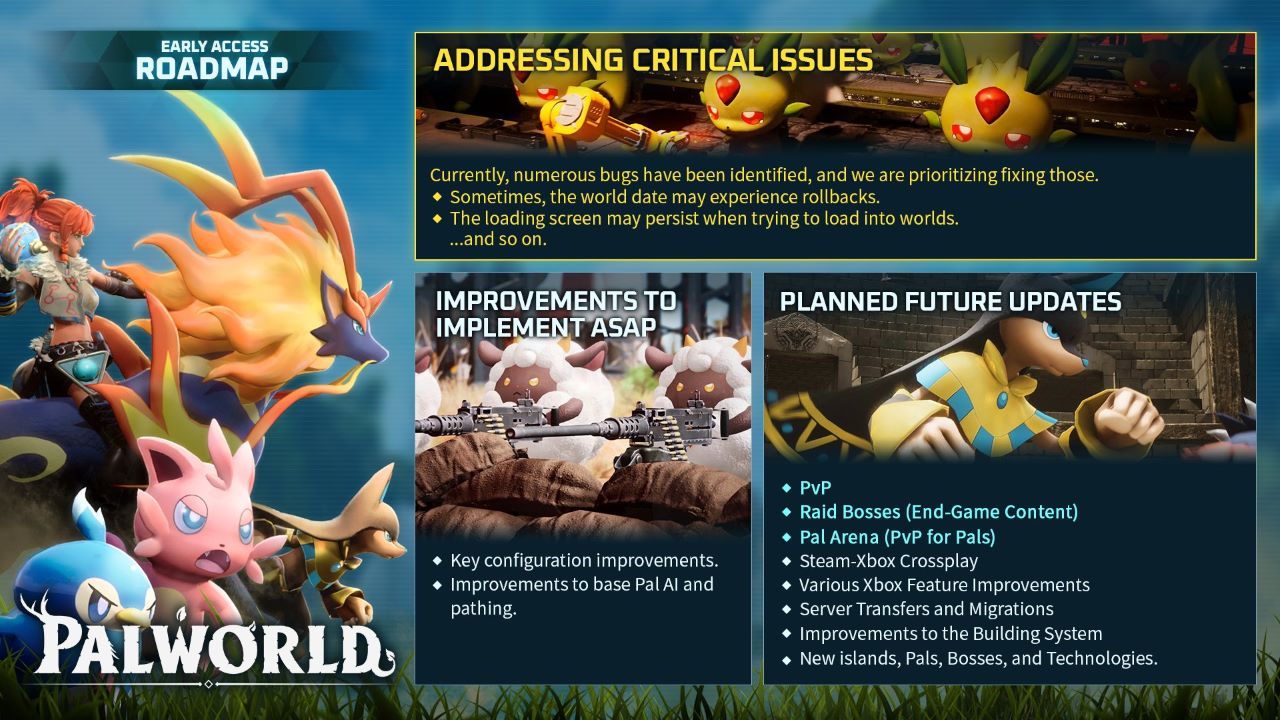
The Early Access roadmap that has been released has no key date details but server/world issues and other bug fixes are taking priority. There will be a shift by the development team to focus on adding the new features stated on the roadmap. There is a great range of content in development, including but not limited to PvP, new end-game Raid Boss content, islands, and even updates to the building system, which will no doubt come in handy for your core bases.
Something that personally catches my eye from the Palworld Early Access roadmap is the improvements to base Pal AI and their pathing. It is unclear whether it is only in the bases in which the AI is being adjusted for Pals, though if it’s the general underlying systems of Pals getting an update, it may add extra flavor to island journeys where Pals could be more reactive/fight even better with players. Either way, the Pal AI adjustments are a great thing to see.
Along with this, multiplayer session errors will likely be lesser once the congestion is fixed by the Palworld team. As part of the future roadmap, Xbox users are getting feature updates which could very well see the ability to rename Pals in the Xbox version added. Of course, it is visible on the roadmap that Steam to Xbox crossplay is also on the way, allowing you to play with any of your friends regardless of platform.
When is Palworld PVP Arriving? | Palworld PVP Release Date
Palworld PVP is one of the biggest anticipations for fans, and it is currently shown on the roadmap in two distinct categories. General PvP and then Pal Arena — which is PvP for Pals themselves — which I can’t wait to try out: it sounds like it will be a hilarious time. There is no current release date for Palworld’s PvP, but I would expect they may arrive at some point during this year.
There is no sign of Palworld slowing down anytime soon with traction from the community, so all of the content updates stated in the roadmap are only just going to keep amping up the hype surrounding the title. Now that you know more about the roadmap, you can dive back into the game and get busy again gathering resources like wool, Paldium Fragments, and of course, catching Pals.
]]>This article will take you through whether you should kill or free Lorenzo in Cabot House of Fallout 4.
- Should You Kill or Free Lorenzo in Fallout 4?
- Is Lorenzo Evil in Fallout 4?
- Can You Get Lorenzo’s Helmet?
- Are There Any Other Ways to Deal With Lorenzo in Fallout 4?
Should You Kill or Free Lorenzo in Fallout 4?
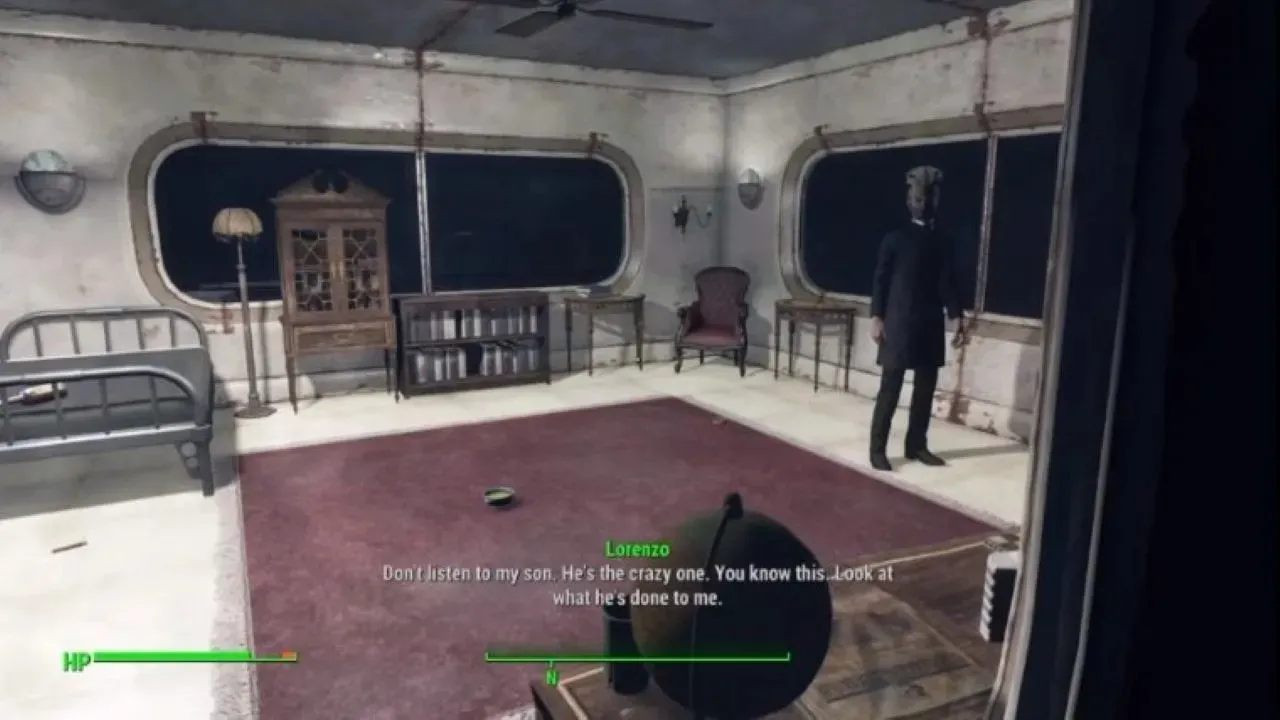
I recommend killing Lorenzo at the end of the quest due to the fact you get the Artifact Gun, which is an excellent weapon and something you won’t be able to get otherwise. However, if you feel guilty of killing a character who has been locked away, then your moral reasoning may push you to the other option. Morality-wise, killing Lorenzo still generally seems like the best outcome for the Wasteland for reasons I will explain later.
What Happens If You Kill Lorenzo?
If you kill Lorenzo, which you do by flipping the four switches on the walls, you head back to Cabot House with Jack where he gives you about 500 caps. If you were kind to him throughout the mission like I was, he will tell you to come back in a week. You can use sleep and wait to make the time pass faster if you need to, or just keep playing and let the week pass by. The mission will update once it has, so you’ll know when to head back.
Once there, Jack will give you Lorenzo’s Artifact Gun, a Gamma Gun with a special perk. This gun does a decent amount of damage, but its true value is in the various effects of the mod. It can stagger enemies and will deal damage in different ways depending on certain factors. It’s one of the best weapons in Fallout 4, and I’ve found it can help you get through plenty of sticky situations.
What Happens If You Free Lorenzo?
If you decide to free Lorenzo, the mission becomes a whole other affair. Once free, Lorenzo will ask if you wish to help him kill his family. Again, be careful what companion you have here as there are a lot of morally grey actions going on. Whatever you tell Lorenzo here isn’t important; just head back to Cabot House for the rest of the mission.
Once there, you are then presented with the opportunity to switch allegiances. If you side with Jack and the rest of the Cabot family, you’ll have a very tough fight against Lorenzo (use the Mysterious Serum you found at the asylum to make it much easier). In the end, you’ll get the caps, but not the gun.
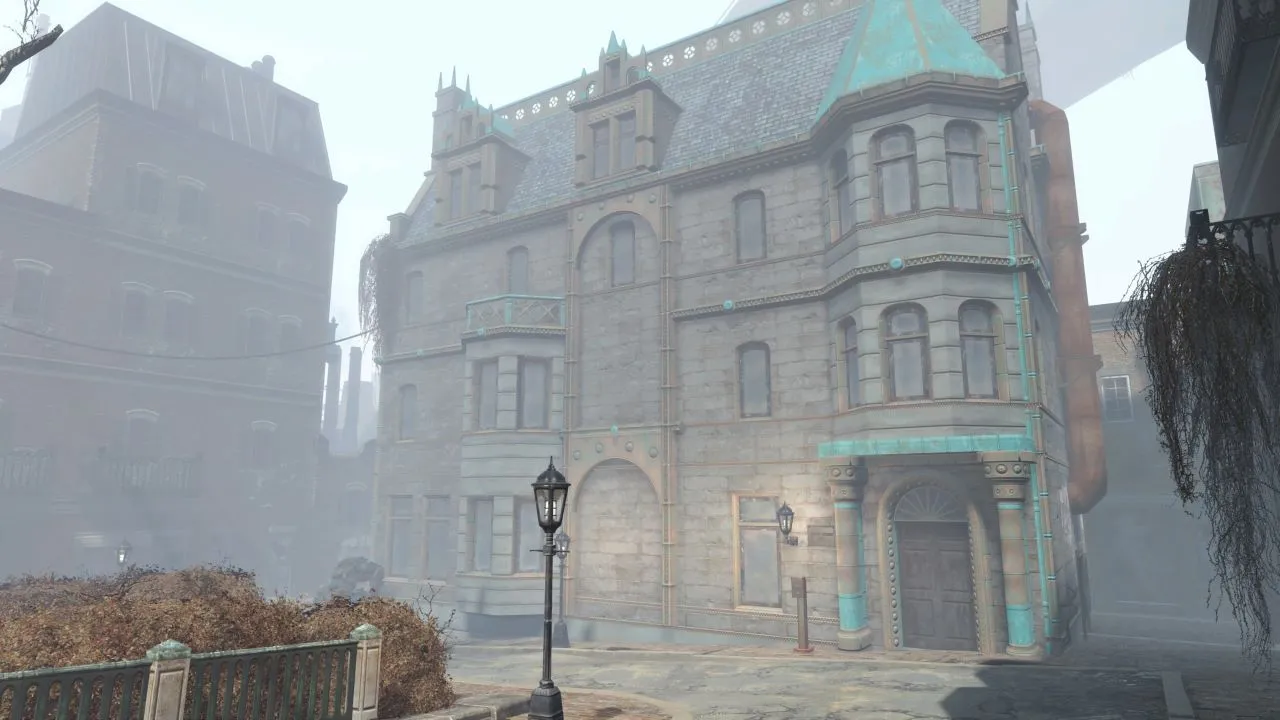
If you stick with Lorenzo like I didn’t do, you’ll assist in killing the Cabot family, though it should be pretty easy, especially if you convince Edward to join your side. Once it’s over, Lorenzo will give you about 500 caps and explain the new deal. You can swing by the Cabot House to grab more Mysterious Serum at any time. You can only ever have one vial at a time, which cannot be traded or sold. Once it’s used, just head back and grab some more.
This serum gives you a considerable Strength boost, as well as a ton of damage resistance and rad resistance. I have found it to be greatly useful throughout the game, so there is no harm in going with this route. If you are willing to slaughter a not-so-innocent family, this could be the best option. Just have Piper or Curie head to one of your settlements before the fighting begins.
Is Lorenzo Evil in Fallout 4?
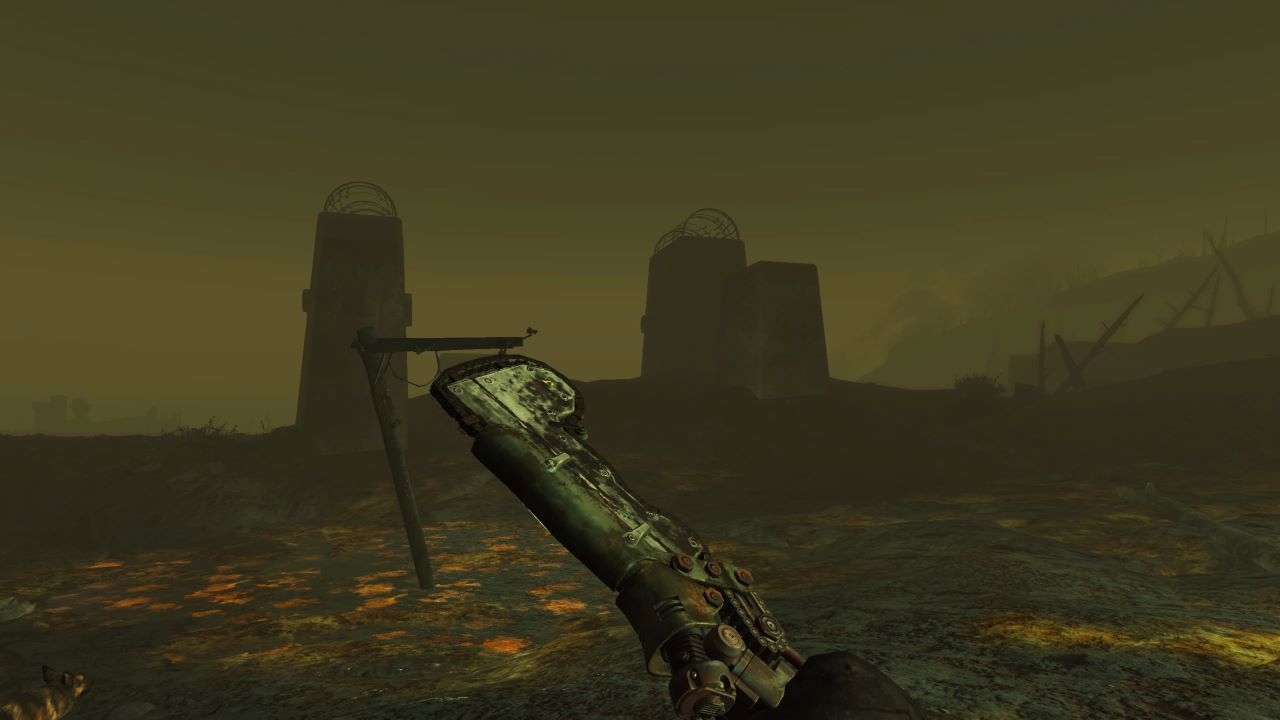
Yes, in my opinion, Lorenzo is evil. If he gets out and isn’t killed, there have been reports of players noticing Lorenzo going on murdering sprees across the wasteland in a serial killer-like fashion. This is not the sign of a morally sane man — rather the opposite — so killing him and acquiring the Artifact Gun isn’t too bad an outcome.
Can You Get Lorenzo’s Helmet?
It is not possible to get Lorenzo’s Helmet by normal methods in Fallout 4. However, if you are playing on a PC, then you can easily use console commands to acquire and equip the helmet. The name of the headpiece is Lorenzo’s Crown, and to bring up console commands, you need to press the “~” key. When you do, type: “player.additem 001467F5” and then confirm that with the enter key.
You will now have Lorenzo’s Crown in the game, but to equip it, you will need to type “player.equipitem 001467F5” and then enter. Now you can happily go around the Wasteland with a brilliant fashion sense on display.
Are There Any Other Ways to Deal With Lorenzo in Fallout 4?
No, you only get two choices to deal with Lorenzo and that will come down to your personal decision of what you think is best. We have explained the reasoning behind each choice, so hopefully, that will allow you to make an easier decision — The Cabot House certainly has a lot of morality involved.
After you get through the choices you need to make with Lorenzo, you can happily walk away with whatever you decide to gain from the quest. Whether you decide to free or kill Lorenzo, we know that you will make the choice that matters the most to you similar to the Pickman’s Gift quest.
]]>This article will take you through exactly how to get the Solid Snake skin in Fortnite if you’re confused about how to do so.
How to Get the Solid Snake Skin in Fortnite
To get the Solid Snake skin you will have to complete four of Snake’s Quests on Page 1 which means you have to spend 950 V-Bucks to purchase the Big Bang Battle Pass first. This is because Snake’s Quests can only be accessed and completed if you have the Battle Pass. So if you have some spare V-Bucks lying around, I would say you should spend them on this Battle Pass as it is the only way to get Solid Snake currently.
When you do have the Battle Pass, you will need to complete four of the following quests to unlock the Solid Snake skin.
- Deal 250 damage to opponents within 10 meters— Gives you the Stun Knife Pickaxe
- Hide in a Cardboard Box for 10 seconds— Rewards you with the Lying in Wait loading screen
- Deal 50 damage to opponents with explosives— Rewards a Solid Profile Spray
- Break two Security Cameras or Turrets— Gives you an exclamation mark Banner Icon.
- Deal 500 damage to opponents with assault rifles— Rewards the “!” emote.
The way that I am going to approach these quests is starting with the Cardbox box quest, then moving on to getting the assault rifle damage, up close damage, and then breaking two security cameras or turrets. Having a shotgun for the up-close damage (within 10 meters) is effective so make sure to seek one of these out in your next round.
Why Are There Two Solid Snake Skins in Fortnite? What is the Difference?
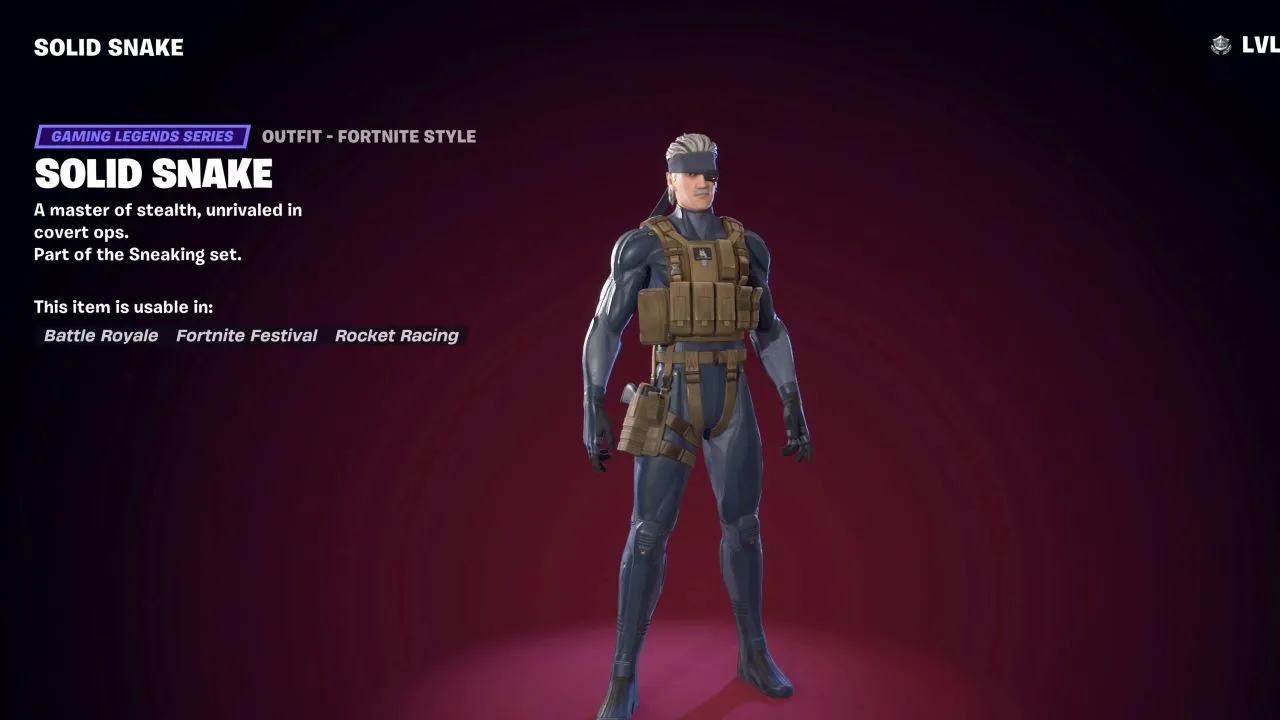
You may notice that there are two skins named “Solid Snake” in the Snake section of Fortnite on the Battle Pass page. This is because there are two styles you unlock. There is the main Solid Snake skin and then there is the “Old Snake” style that can be attached to the Solid Snake outfit you receive from completing any four of the first Snake page quests.
To unlock the Old Snake style, you have to complete all of Page 2 for Snake’s quests which I have listed below for you.
- Use EMP Stealth Camo three times— Rewards the Metal Gear MK. II Back Bling
- Damage 10 different enemy players before they damage you— Gives the Snake Skin Wrap
- Use a hiding spot in five different matches— Rewards the Hidden? Emoticon
- Deal 2500 damage to enemies with a weapon that has a suppressor attached— Rewards the Tactical Advantage Loading Screen
- Assist in opening three Vaults or hack three Train Heist Chests — Rewards the Slider Glider
Now that you know how to get the Solid Snake skin in Fortnite, you can jump back into the experience and add this legendary character to your ever-growing collection of skins.
]]>This article will take you through how to get Wool in Palworld fast without any hassle of hunting around if you don’t want to.
Best Ways to Get Wool in Palworld
The best way to get Wool in Palworld is by building a ranch and assigning certain Pals such as Lamball and Cremis. When you have a ranch and have these Pals working away inside, they will automatically generate wool for you to collect off the ground. However, if you don’t want to be waiting around, then you could always go and catch (or kill, if you’re in a devious mood) Pals that drop wool like Lamball does.
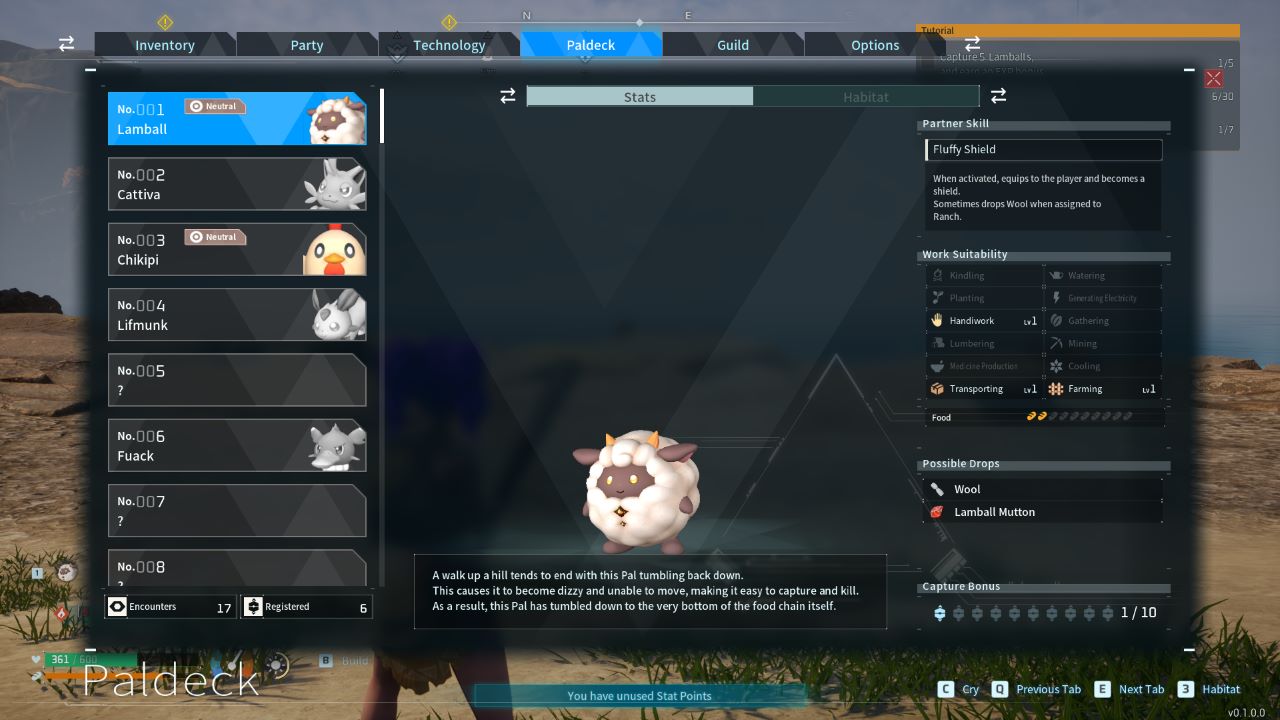
A great way to quickly check which Pals drop wool is using the Paldeck and looking at the “Possible Drops” section on a Pal. I have personally found Lamball and Cremis to be the best early-game sources of wool farming. However, that all changes when you have the ranch built.
Wool can also be bought from Wandering Merchants for 100 gold, and you can tell when a Wandering Merchant is on the way as the game will tell you a Visitor is approaching your base. They are also indicated on the compass minimap by an icon that looks like a character’s head.
How to Build a Ranch in Palworld
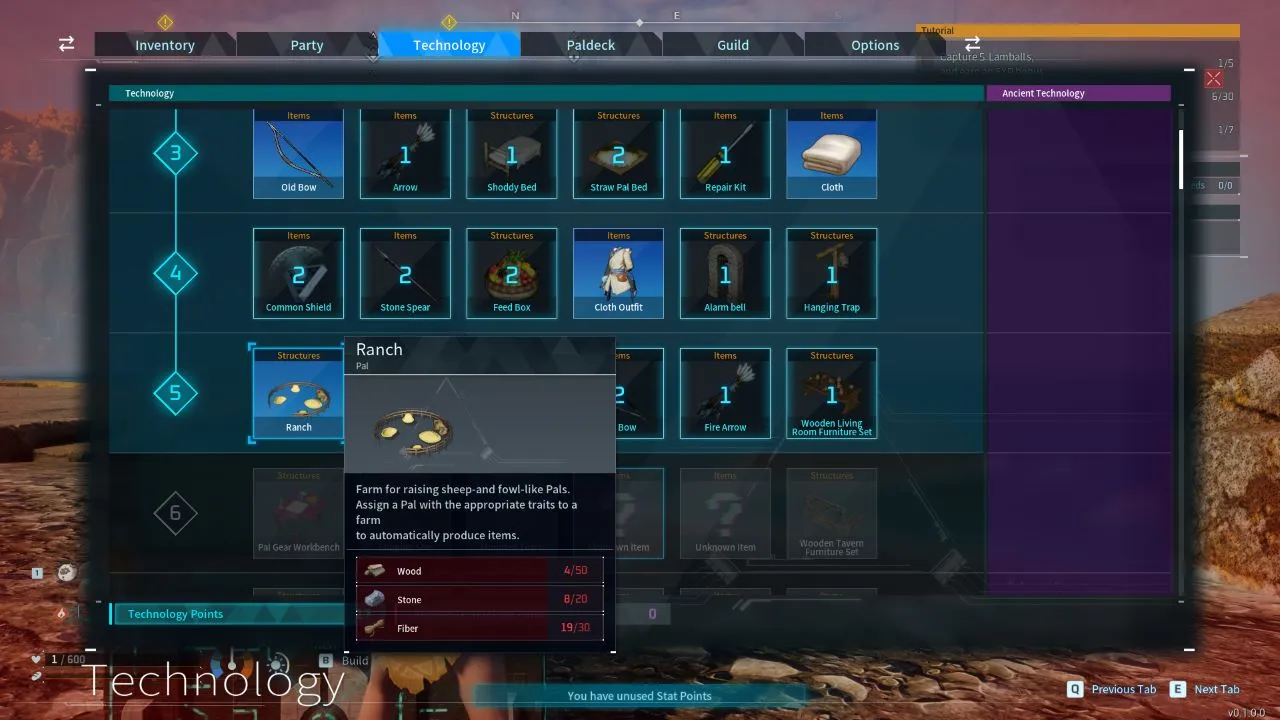
You can unlock the Ranch once you are level five in character level. On the Technology menu, you purchase it for two Technology Points, which will then allow the Ranch to be crafted. It is only basic materials required for the Ranch, but you will need to stock up a lot. You will need 50 Wood, 30 Fiber, and 20 Stone in total.
When you have the materials needed, you can build and place the Ranch in your base, then assign Pals like Lamball. I also would recommend if you have multiple bases to set up other Ranches in the same way at those other bases. This will effectively mean you get up to double the amount of Wool for the same amount of time.
Now that you know how to get Wool in Palworld, you can start gathering plenty of it while leveling up. You’ll have hordes of Wool waiting for you before you know it.
]]>This article will take you through exactly how to join your friends’ game in Palworld and similarly invite them to yours.
How to Play With Your Friends in Palworld
To join a friend’s world in Palworld, you need to select “Join Multiplayer Game (Invite Code)” from the main menu. When you do this, there will be a prompt to enter an invite code and this is where your friend will need to get a code for you. First of all, your friend will need to have/create a multiplayer world by toggling multiplayer to “on” when setting up the world.
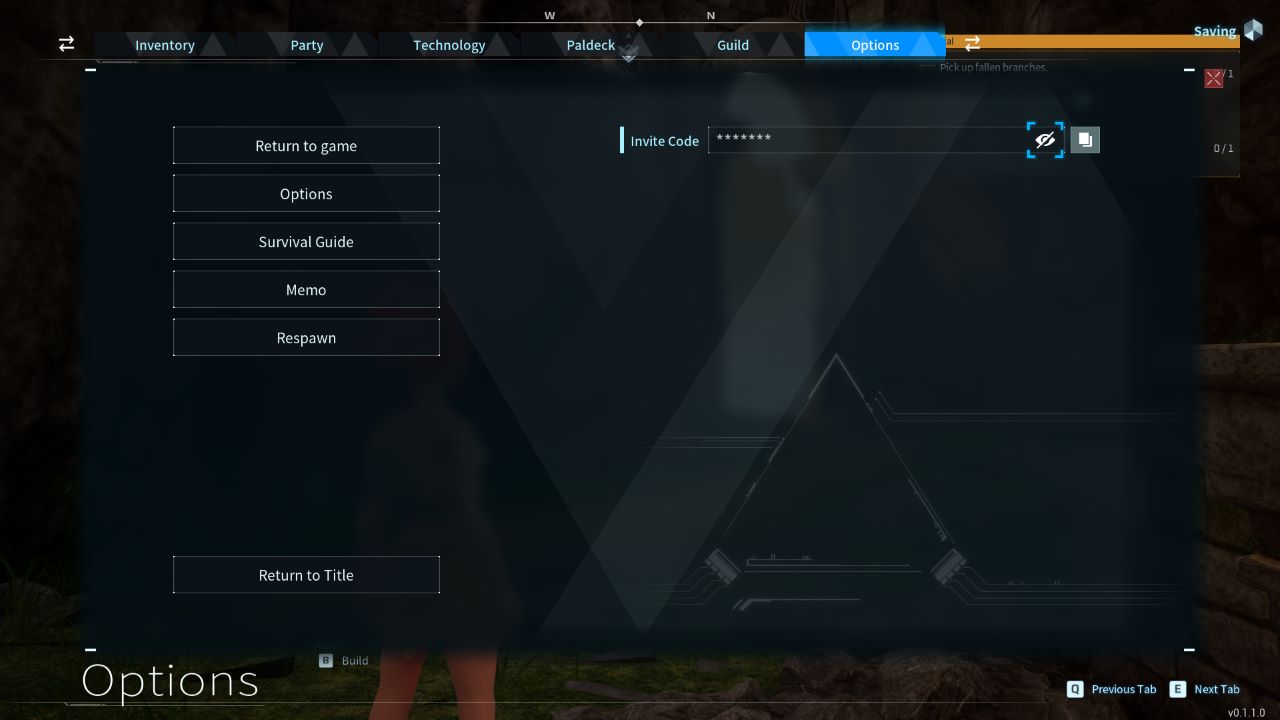
When the multiplayer world is active, your friend can enter that world and pause the game. When paused, there will be an “Invite Code” section visible. Your friend will need to select the eye icon to reveal the code. When the code is revealed, get your friend to tell you the code, and you can enter it within the main menu’s join game function. Once entered, you can join your friend’s world.
It is the same process required if you want to invite your friend, except they will need to enter the code instead of you and you’ll be the one in the world getting the code.
Can You Play Multiplayer in Palworld on Xbox?
Yes, you can play multiplayer in Palworld on Xbox, though I have found with the Xbox Game Pass version that crashes can sometimes happen when trying to set up a multiplayer world. The only large difference between PC and Xbox multiplayer for Palworld is that Steam users can host a dedicated server, meaning that up to 32 players can be present instead of just four-player co-op on Xbox.
Now that you know how to join friends’ games in Palworld, you can easily take advantage of the multiplayer features that do exist for the platform you are on. Time to get busy catching plenty of Pals like Vixy together.
]]>We all knew it was inevitable, but who could have predicted that a mod like this would appear right after Palworld’s Early Access launch? Even though I find Pals cute and charismatic, it’s impossible not to enjoy seeing Pokémon in this game. It’s kinda like playing a game that we always wanted and Nintendo never bothered to develop for us.
How to Turn Pals into Pokémon With Mods
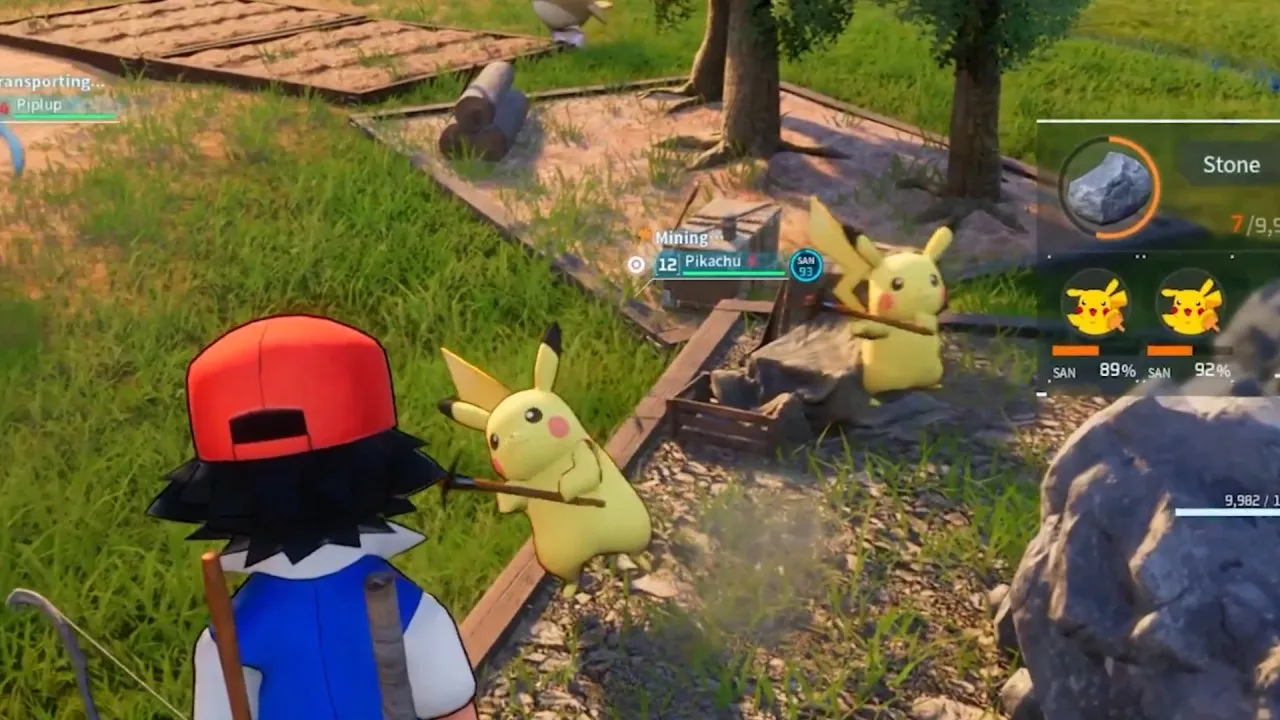
The mod pack that turns Palworld into Pokémon was just announced by ToastedShoes, a famous content creator who is constantly coming up with new mods for several games. The latest mods presented by ToastedShoes on YouTube and X featured Disney characters in Mortal Kombat. However, he just announced a huge mod pack for Palworld that looks incredibly promising.
Unfortunately, he hasn’t released the mod pack yet, and we’re all anxiously waiting for it. According to Toasted, those who want to turn Palworld into Pokémon have to wait until the next day and check his YouTube channel for more information.
Until then, I’ll just be imagining which Pokémon will replace which Pal. We know that Jesse and Electabuzz will replace Zoe and Grizzbolt during the first boss fight, which is perfect. But now I’m wondering, will Foxparks be Vulpix? Will Anubis be Lucario? I’m not sure, but I can’t wait. As long as I can get a Charmander, a Bulbasaur, and a Squirtle, I’ll be happy.
With the success of Palworld and the first of many mods to come that add Pokémon to the game, one can only hope Nintendo will finally make an innovative Pokémon game. It’s pretty clear by now that players are looking for something new with their favorite pocket monsters. In the meantime, I’ll be here, busy crafting guns for my Pikachu.
Will the Palworld Pokemon Mod Get Removed?
Yes, it is highly likely that if the Palworld Pokemon Mod does get publicized, it will immediately be removed as soon as possible by Nintendo. At the time of writing, Toasted has already had his tweets media disabled via copyright. It is never a wise move to encroach on anyone’s copyright for a mod, as there will generally always be repercussions — especially when dealing with Nintendo.
I would recommend that for the time being, you don’t get your hopes up too much like we did of this mod becoming a reality for everyone. Toasted still seems set on releasing the mod in some way for the future, but at the end of the day, lawyers knocking on the door will be sure to sway anyone. While you’re waiting on the outcome, you can always get busy setting up multiple bases in Palworld for the journey ahead.
]]>This article will take you through how to change Pal names in Palworld, along with if it’s possible to alter your character name in any way.
How to Change Pal Names in Palworld
You can change any Pal’s name by having them in your party and selecting the Pal you wish to rename. Within the Pal’s details/stats menu, you will see an “Edit” button on the right side of the name and level area. Click this and you can rename the Pal. You need to keep to a name that is under or equal to 24 characters, but that is the only requirement.
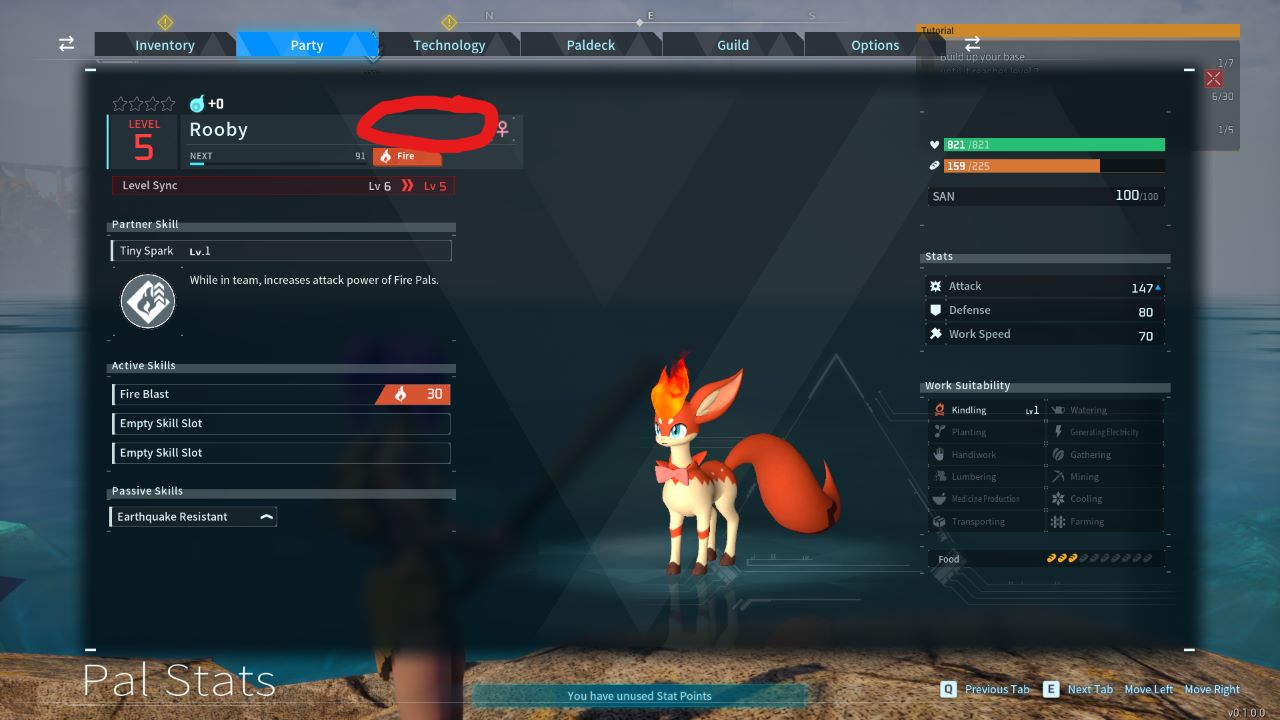
At the time of writing, it is known that this option doesn’t seem to appear for Xbox Game Pass players, and only Steam players can rename Pals. I also am going through the same experience with not being able to adjust the name of Pals, so don’t worry, you aren’t alone if you’re playing with Xbox Game Pass and are running into this issue.
Can You Change Your Character Name in Palworld?
While you’re busy exploring the world of Palworld, you may want to also adjust your character name instead of it showing as a generic title with a few numbers. For Steam players, you can name your character at the start of the game for one time and one time only. However, Xbox Game Pass users will not get any option to name their character at all.
Over time, this may likely change, especially given the fact that Palworld is still in Early Access. For the time being, most will need to embrace your Player’s numbered name in all of its glory unless you are a Steam player and named your character at the start. Now that you know how to change Pal names in Palworld, though, you can take this knowledge on for whenever you need to use it.
]]>This article will tell you how many bases you can have in Palworld and take you through the steps for making the process faster to have more bases.
How Many Bases Can You Have in Palworld?
You can have three total bases active at once in Palworld, but there are certain requirements you have to meet first. You can establish any base by placing a Pal Box and building it. This will then let you attach Pals to your base, along with also using it as a respawn point. The base acts as your central hub of operations, so it’s important to place it somewhere you know is abundant in resources like wood, ore, and stone, which you’ll consistently need. I have my first base on a shoreline close to a forest, and this has been working excellently for me, so you can try the same if you wish.
Eventually, when your base is level 10, you will be able to build/place another Pal Box, which will act as a second base. Likewise, when you reach level 15, you can have a third and final base active at once by placing yet another Pal Box down. All in all, this means you will spend quite a bit of time in the early game with your first base before having multiple.
How to Level a Base Fast in Palworld
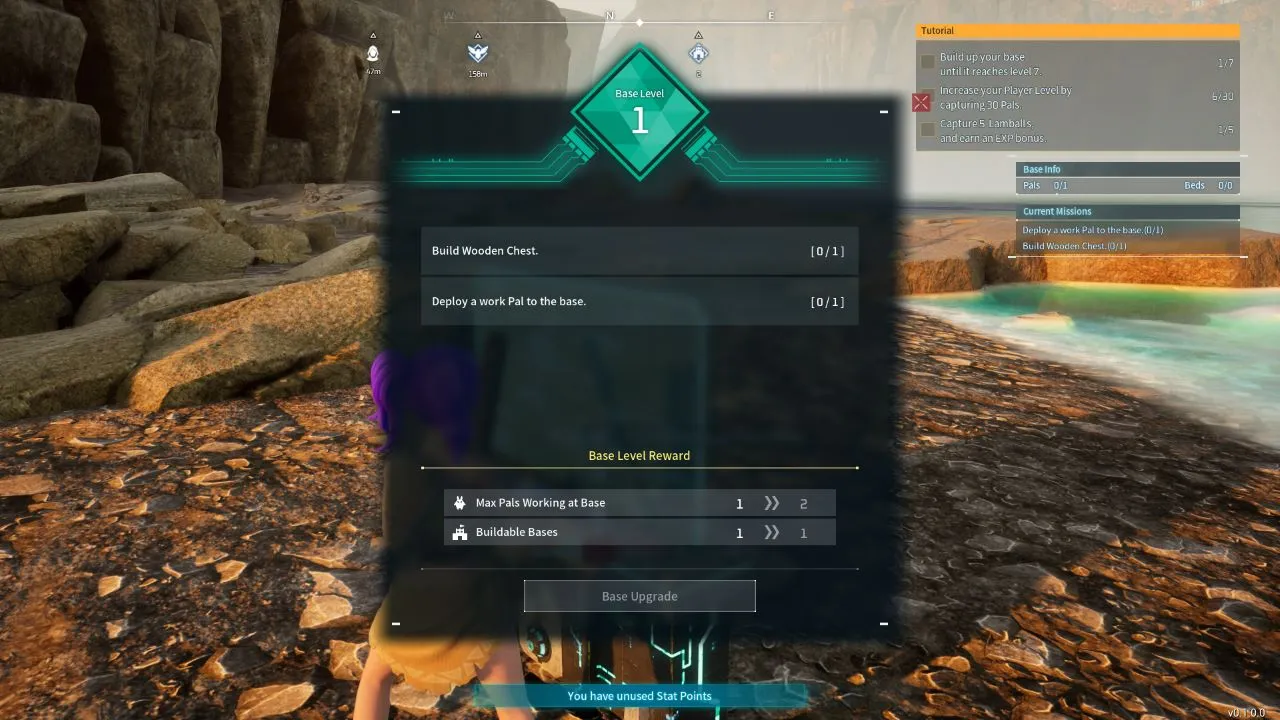
You can upgrade your Base level by completing missions that can be found through the Pal Box. At first, these missions are very quick to complete, such as building a wooden chest. The best way to go about leveling a base is always to make sure you are completing at least one or two missions per survival day. If you have a goal in mind of reaching level 10 for your base, then it will be quicker to keep that focus in mind rather than venturing off and doing random explorations.
Benefits of Upgrading a Base in Palworld
The more you upgrade your base, the more Pals you can assign to a base, so this very quickly becomes something you will want to have anyway. For each base level upgrade, you will gain one extra Pal slot for the base. This means more work will be done to a quicker degree because there will be more Pals hustling away at once when assigned.
Now that you know how many bases you can have in Palworld, you can jump back into the vast world and begin building out a base empire in no time.
]]>This article will take you through exactly how to get the Speed Cola schematic easily in MW3 Zombies.
MW3 Zombies: Where to find the Speed Cola Recipe Schematic
You can get the Speed Cola Recipe as random schematic drops in Reward Rifts from Threat Zone 1 contracts in MW3 Zombies. This makes Speed Cola one of the easiest Perk-a-Colas to get in the game, which is great considering it’s such a valuable asset. You’re almost guaranteed to find one after beating only one contract, so take it easy, as you won’t need much more than maybe an Uncommon weapon to handle any of these contracts.
Unlike the Epic Aether Tool in Zone 3 or even the Raw Aetherium Crystal in Zone 2, Speed Cola is one you can approach nearly any way due to how much easier Threat Zone 1 is. You can chain together a ton of contracts that are packed together in this portion of the game’s map and find any of the following schematics:
- Brain Rot
- Cryo Freeze
- Deadshot Daquiri
- Napalm Burst
- Speed Cola
- Stamin-Up
Once you’ve found the Speed Cola Recipe, extract from any Exfil point in Zone 1 to play it safe and keep this valuable Perk-a-Cola. It’s my favorite, as it can get you out of a bind even with Pack-a-Punch weapons when you need to reload in a sticky situation, dropping the wait time to a fraction of the regular reload animation.
Best Contracts to Get Speed Cola Schematics in MWZ

Unsurprisingly, Cargo Delivery is among my top recommendations for farming to get the Speed Cola schematic in MW3 Zombies. However, even while playing solo, you can also reasonably chain that with some Big Bounty, Outlast, and Raid Weapon Stash contracts without feeling too pressured. My main advice is to switch it up if you’re comfortable, as running constant Cargo Delivery missions can get stale.
How Do You Get Schematics in MW3 Zombies?
All schematics in MW3 Zombies can be acquired through contracts and missions. I have personally found contracts to be extremely successful for gaining a lot of schematics in quick succession — as was the case with Speed Cola. Further, a user on Reddit took time to create a loot table that has information on what every schematic can be linked to, so that can act as a great point of reference.
Overall, be sure to complete contracts whenever you can, and you will have plenty of schematics in no time. Now that you know how to get the Speed Cola schematic, you can dive back into the world and grab it for yourself.
]]>The process of joining Guilds is simple when you do it once. This article will take you through how to both create and join Guilds in Palworld.
How to Create Guilds in Palworld
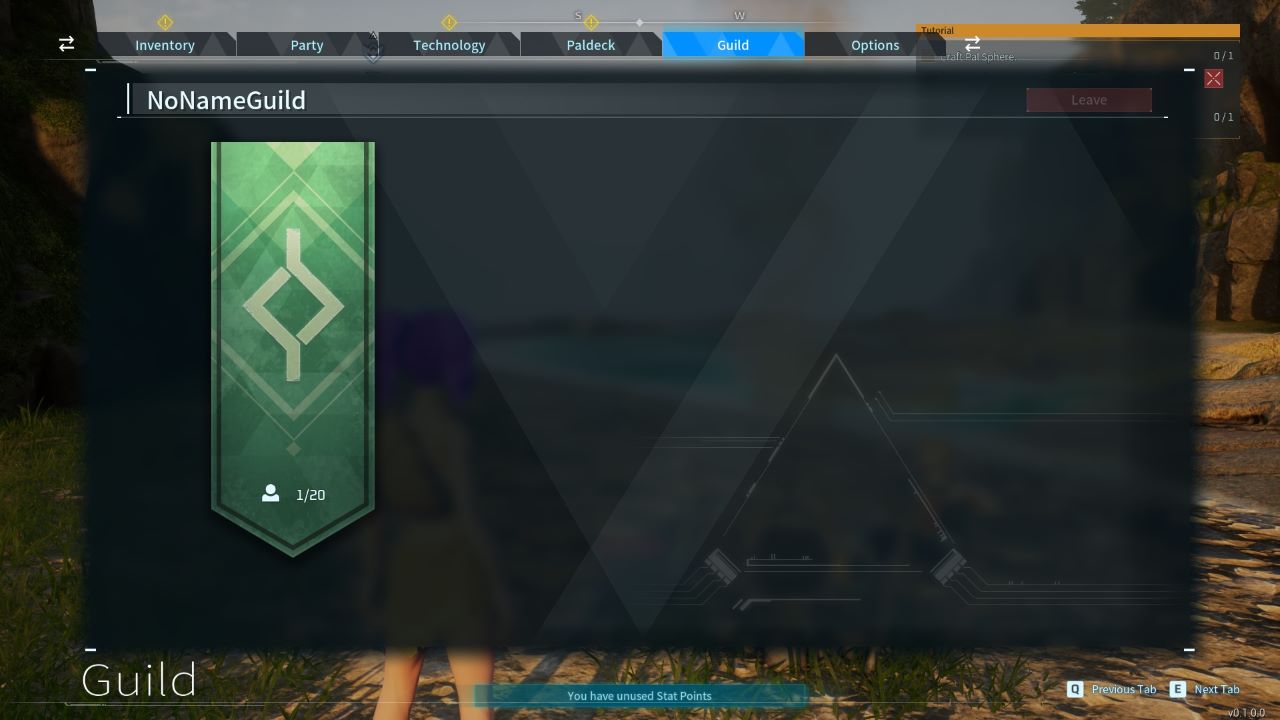
You cannot currently create a guild in Palworld at the time of writing, although you are automatically put into a custom guild upon starting the game. Your guild will be titled “NoNameGuild” and the Guild tab on the menu shows it allows up to 20 players. I found this confusing at first as it isn’t too clear how the guild system works at all on this menu.
It’s important to know you also aren’t able to rename the Guild in any way, so prepare to be a part of the no-name crew for quite a while. Since Palworld is in Early Access, customizable guilds will likely be added over time, whether in Early Access or the full release. It is still excellent that there is a form of guild system in play at the moment.
How to Join Guilds in Palworld
Joining Guilds is much easier than it first appears as all you have to do is find other players in an online world session and go up close to them. When you do, there will be a “(Press and hold) Join Guild” prompt for you to select. The key/button press you need to do is holding F on PC or holding X if you’re on Xbox/using a controller.
Once you have requested to join another player’s Guild, they will get a pop-up that lets them deny or accept your request. Likewise, you can accept or deny a player through this same method. Now that you know how to create and join Guilds, jump into a multiplayer session to do this yourself.
]]>Since it is clearly on show in the Graphics settings, you will want to try to fix this. This article will take you through if you can get DLSS working in Palworld.
Is It Possible to Get DLSS Working in Palworld
DLSS should work for those on Steam, but everyone on Xbox Game Pass will not be able to use DLSS. In our site’s opinion, this could be down to versions being slightly different on both Steam and Xbox Game Pass. For example, at the time of writing, some Technology equipment has different names from one another, like the Pal Distillation Pod, which is known as a Pal Essence Condenser in another version.
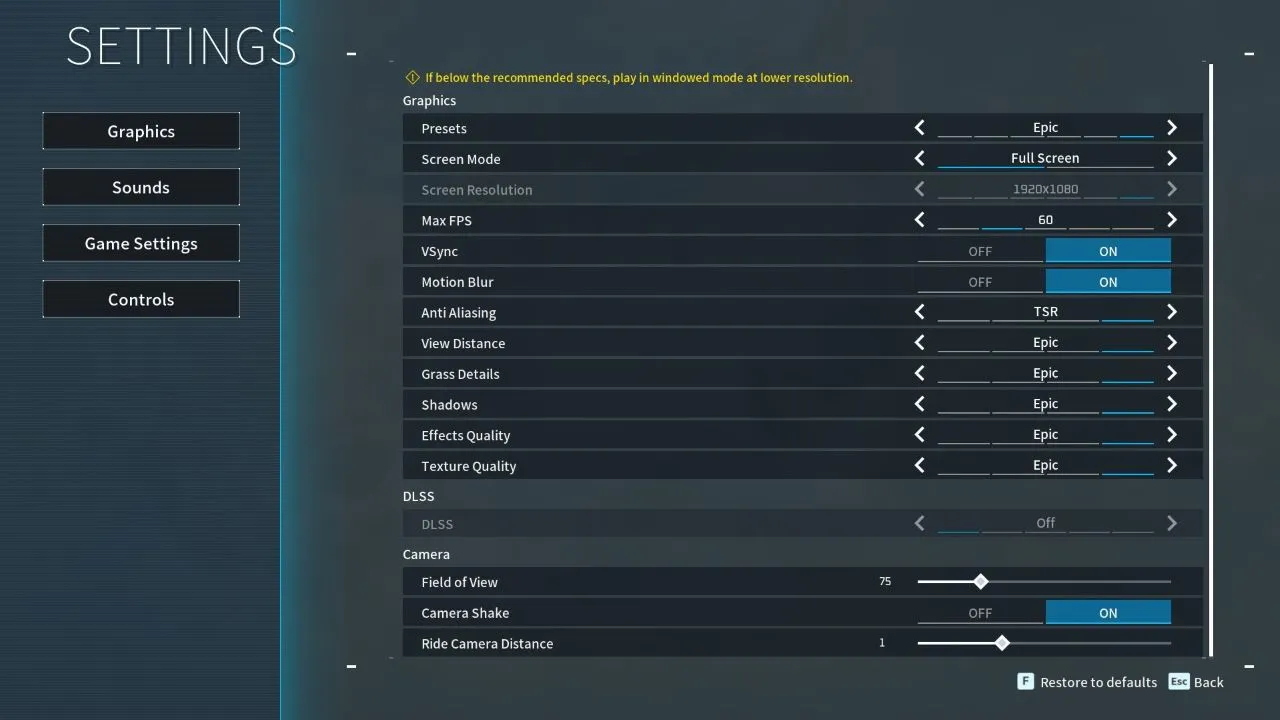
Likely, the DLSS option will soon get fixed for those playing on Xbox Game Pass after the versions have been properly matched together. For the moment, you will not be able to activate any DLSS on Xbox Game Pass, so for the time being, you will have to get used to no DLSS assistance while exploring around the vast world.
What is DLSS? Explained
DLSS is otherwise known as “Deep Learning Super Sampling” and, simply put, is a system that uses a type of AI learning to upscale an image from a deliberate lower resolution. This means that the framerate is kept higher with no impact on graphic quality. I suggest toggling this setting on if you want the best performance possible for games, and DLSS is frequently added to new titles.
Now that you know why DLSS is greyed out for Xbox Game Pass players on Palworld, you can get back into the game and focus on other vital features, such as breeding Pals instead.
]]>This article will take you through everything we know about how to fix the Multiplayer Session Error in Palworld.
Fixing Multiplayer Session Error in Palworld
The first thing you should do when encountering this error is check if the servers are having a genuine issue that the developers are already aware of. Similar to other error codes, if everyone else is encountering issues with the online session creation alongside general server problems, then that means there won’t be a fix. You will have to wait until the developers fix the servers and I recommend following the Palworld Twitter for updates on this.
However, if you have checked and there aren’t any server problems for Palworld, but you are experiencing the Multiplayer Session error, then the next best thing is to restart the game and try again. As simple as it sounds, sometimes this is efficient enough to sort out any strange glitches in online games. Along with this, reset your Wifi if you’ve not had any luck with a simple restart.
Once you’ve tried all of those and have not had success, I recommend reaching out to others/the development team via the official Discord. There is a section named “palworld-help” and this is where you should mention the issue.
How to Keep Track of Server Status for Palworld
Check Palworld’s server status through the main status page, which updates consistently. Updates are shared in the form of boxes at the top of the page, so it is highly useful for quick checks alongside the Twitter account. In general, use the status page for a fast way to check the servers.
Now that you know what the process is for attempting to fix the Multiplayer Session Error, you can jump back into the brilliant hand-crafted world with friends once it is fixed.
]]>This article will take you through how to stay warm in Palworld easily without having to worry about a cold chill catching up with you.
Best Ways to Warm Up Fast in Palworld
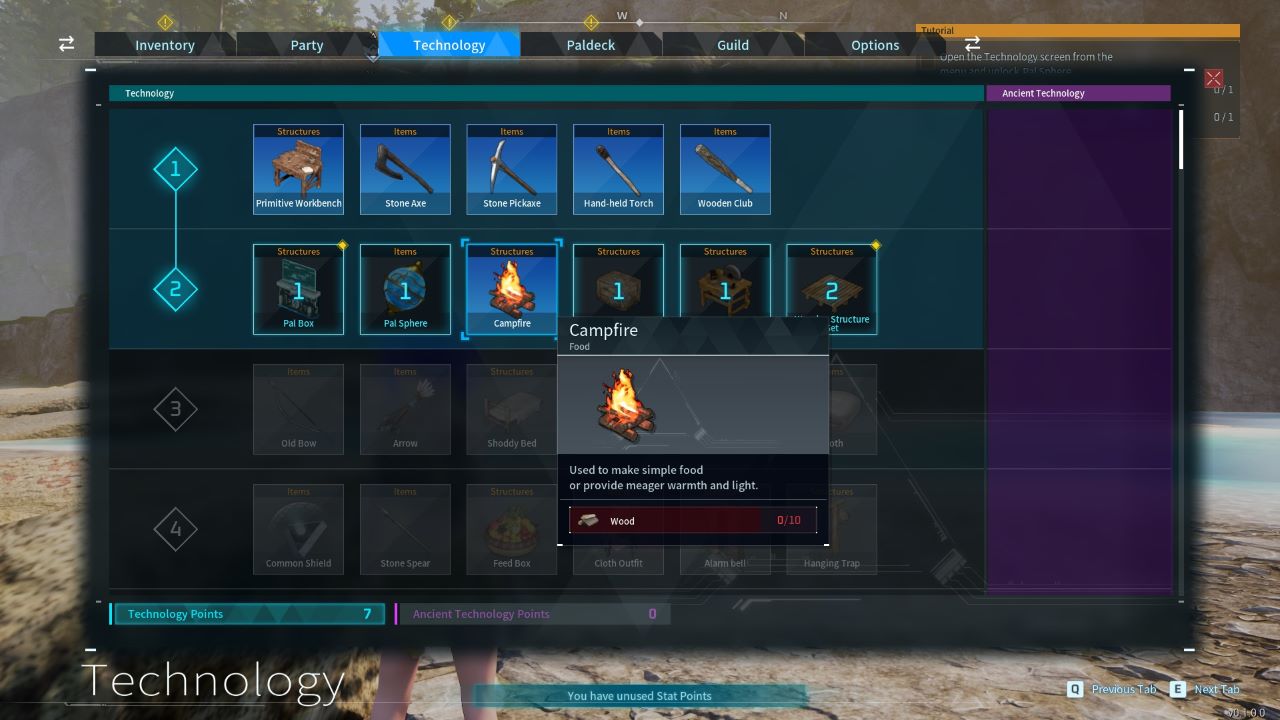
To warm up quickly in Palworld I recommend finding an open campfire around the world and then standing next to it. For example, I found a Campfire/open flame at Marsh Island just a tiny distance away from the main southeast teleport. You won’t need any immediate resources for this process compared to building a campfire if you’re in a predicament and need warmth as soon as possible.
Marsh Island itself is also a brilliant place for gathering some general resources such as basic Wood, Stone, and Paldium fragments I have personally found. The next best way to stay warm in Palworld is to build a Hand-held Torch at a workbench. You can do this for two pieces of wood and two stones once you have built a workbench by using two other pieces of wood.
Fire-type pals (such as Rooby) will also warm you up slightly when standing around them. Likewise, you could also build a campfire but you’ll need a fire-type pal to light it up so that’s why the other two methods are quicker in the early game. Another great way to stay warm is by crafting and wearing armor like the Cloth Outfit after unlocking it through the “Technology” menu for two Technology Points after you have them.
How to Build a Campfire in Palworld
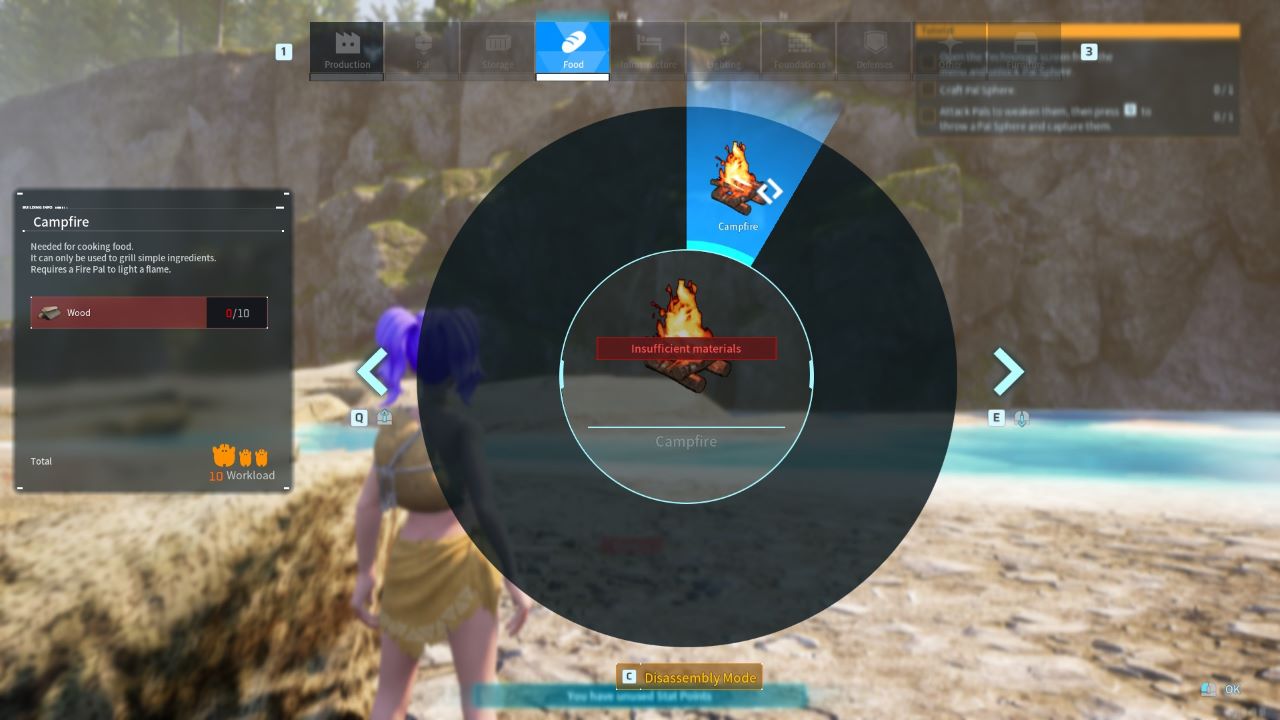
When you would like to build a Campfire, unlock it from the Technology menu for one point. After that is done, access your build menu with B on a keyboard or X on a controller, and go to the Food tab. You can then build the campfire if you have 10 Wood to spare. These campfires are excellent to have, especially since you kill two birds with one stone: a quick way to warm up and an easy way to make food.
How to Tell If You Are Too Cold or Warm in Palworld | Check Temperature
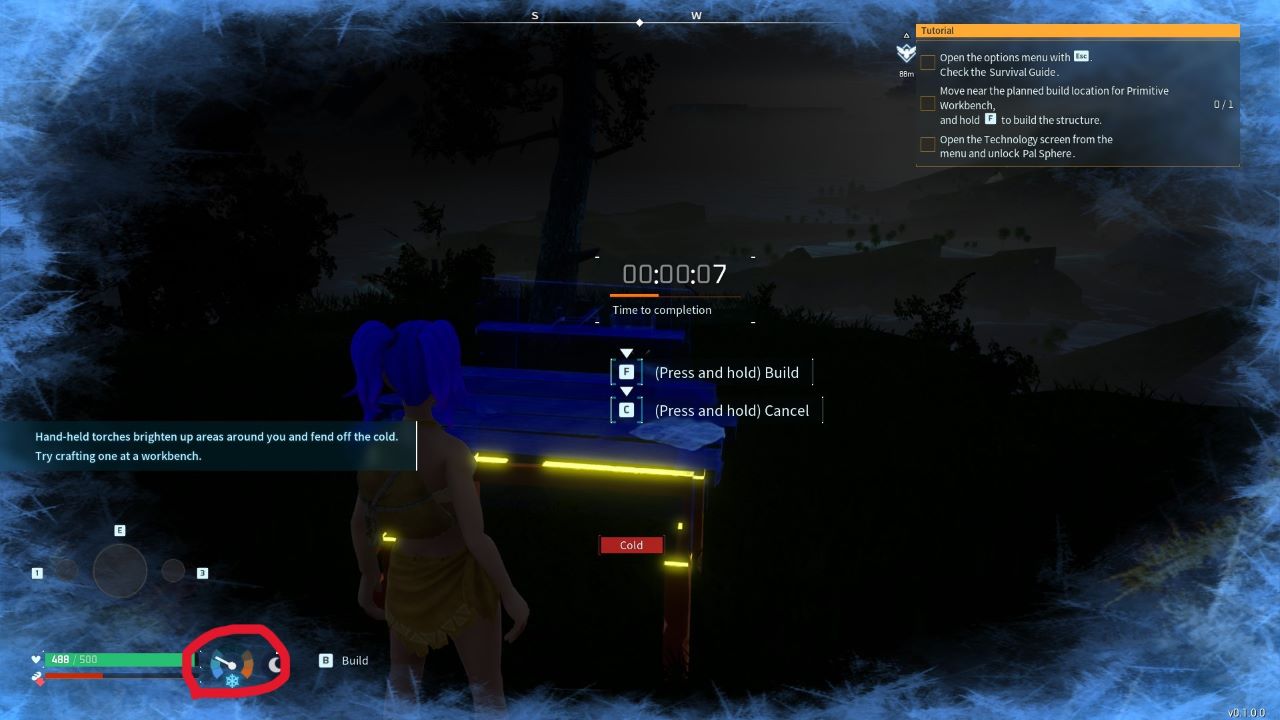
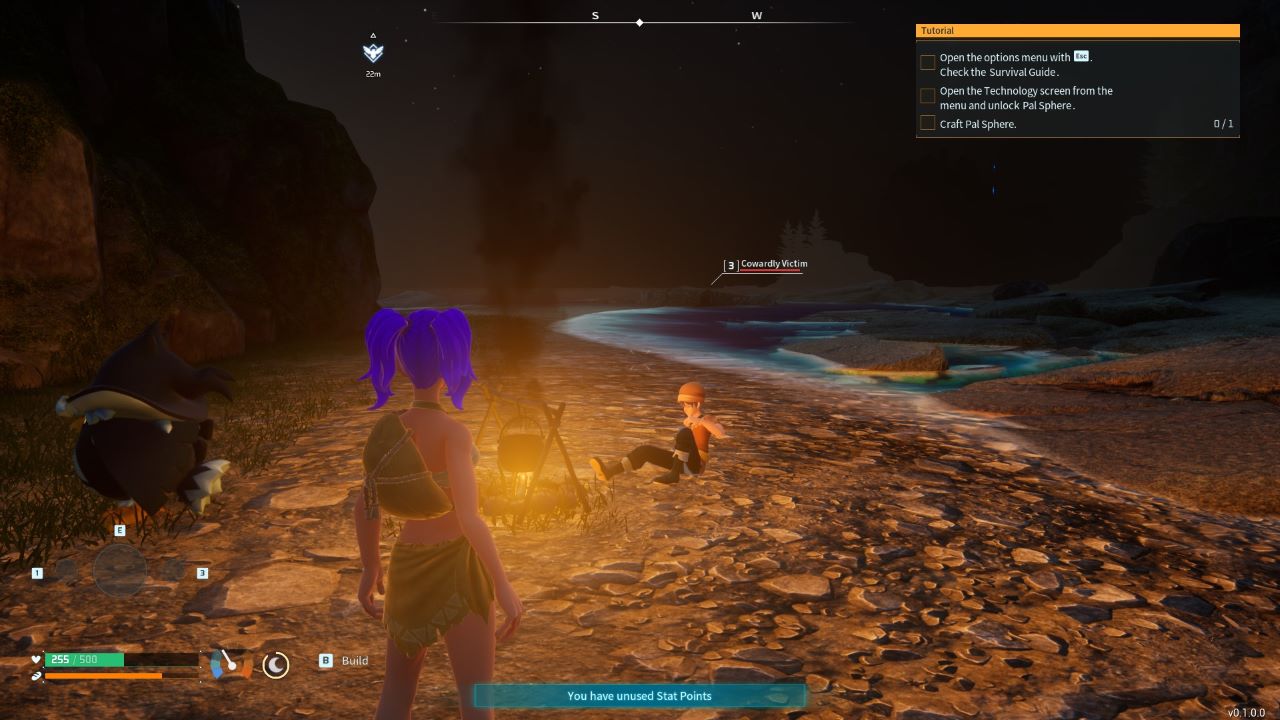
Whenever you are too warm or cold in Palworld, the game will make it crystal clear to you that you need to return to neutral stasis. There will be a status prompt that shows up, i.e.: “cold,” and then along with that, the screen will also have a border effect, as shown above. The small dial with the white pointer I have highlighted is where you can keep track of your character’s temperature at all times.
Now that you know how to stay warm in Palworld you can dive back in and start leveling up all of your stats once again.
]]>I am here with some good news which is, unlike many error codes, this one can be fixed by yourself. Here is how to fix error code 0x803F8001 in Palworld.
Fixing Error Code 0x803F8001 in Palworld
The 0x803F8001 error code doesn’t have anything to do with Palworld as a game, it is commonly due to a Microsoft-side error so only Xbox/Game Pass users may run across this specific error. To fix it on PC, you will need to effectively refresh the Microsoft Store app itself to then try and launch Palworld again without the error. Follow the steps I have written below to do this.
- Click on the Windows Icon (four squares) at the bottom-left of your desktop.
- Search for “Settings” and select it.
- Find and open the “Apps” section on the left-hand side and then go to “Installed Apps.”
- Search up “Microsoft Store” then select “System Components.”
- Click the three dots beside the Microsoft Store app and click Advanced Options.
- Scroll down and click on “Reset.”
Once you have done this, try and start up Palworld again and you should hopefully find it will now work for you without any issues. I recommend trying this fix before reaching out to any support team if you are encountering the error.
How to Fix Palworld’s 0x803F8001 Error on Xbox
If you are playing on a console instead, then the process takes longer, but it should get rid of the issue. You need to head to your Xbox System settings page and then navigate to the Console information section. From there, you can choose to reset the console, but make sure to choose the option that keeps games and apps. I will say you should be very careful when doing this as you don’t want to accidentally lose a ton of time installing games (and Palworld) again.
Now that you know how to fix error code 0x803F8001 in Palworld, you can get back into the game and start gaining Technology Points fast.
]]>The remaster will have many old-time fans like myself jumping back into the game again at one point or another, so here is exactly how to upgrade to The Last of Us Part 2 Remastered.
You will only need to spend $10 in total for the PlayStation 5 upgrade of The Last of Us Part II and the process is very simple. Below, we’ve explained how you can upgrade to the Remastered version with both a digital and physical version of the game.
Upgrading to The Last of Us 2 Remastered with a Digital Version
All you need to do is navigate to the PlayStation Store, then search for ‘The Last of Us Part II’ and go to the game’s page. When you are on the main game page, buy the upgrade for $10/£10. Once purchased, you will be able to play the remastered version when it is installed.
You can take advantage of all of the new graphical changes, a new “No Return” roguelike game mode, Guitar freeplay (yes, you heard that right, more guitar time), and much more. I would say the upgrade is highly worth it if you enjoy The Last of Us game/TV series and want to play through the title in a brand new light but also enjoy all of the additions that are included.
How to Upgrade to The Last of Us 2 Remastered With a Disc
If you are a disc user like me and had The Last of Us Part II in that form on PlayStation 4 then I have noticed the process for upgrading is slightly different. You will have to first put the disc into your console, meaning you have to have the disc drive PlayStation 5.
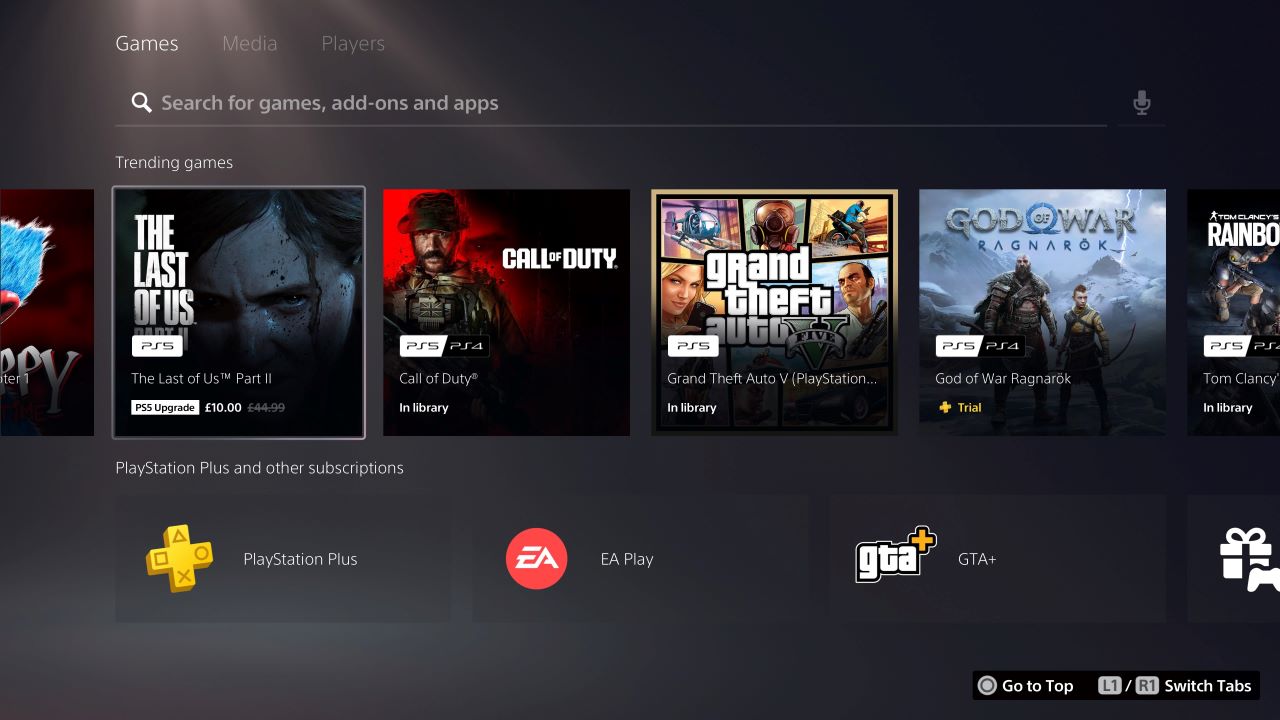
Then when you go to the Last of Us Part II on the PlayStation Store, the upgrade will be there to buy after you have installed the game again.
I have found the upgrade doesn’t show at all unless you have the disc inserted, so keep that in mind. The disc not being inserted is the only reason why the upgrade won’t be available at the discounted price. Now that you know how to upgrade to The Last of Us 2 Remastered you can dive into this excellent title once again.
]]>I found this process to be slightly confusing at first, so the article will take you through how to attach silencers, scopes, and more to weapons in Cyberpunk 2077.
How to Attach Scopes and Silencers in Cyberpunk 2077
To attach scopes and silencers, open up your inventory and then locate where your currently equipped weapons are. Select one of your weapons that you would like to attach scopes or silencers to. Some weapons will not have attachment slots, but there will be either a “Muzzle” slot, a scope slot, or both. For silencers, you need to select the open muzzle slot, and you can attach one from there. Likewise, if you would like to add a scope, select the open scope slot, and then you can put on a scope.
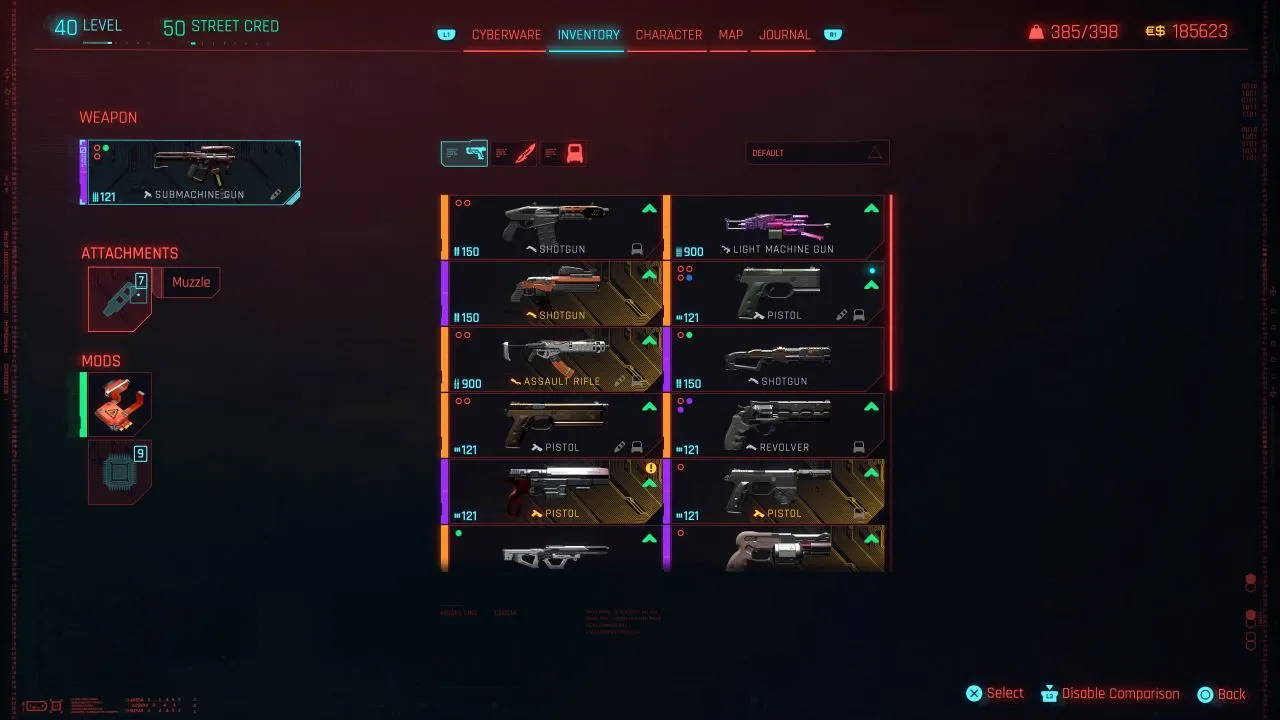
A quick way to tell which weapons will let you attach a scope or muzzle is to look at the small icons in the bottom-right corner of weapons in your inventory. If a certain icon is present (scope or muzzle), then that means you will have those attachment slots for that weapon. if there is none of those, it means no scope or muzzle can be equipped.
Related: Best Cyberpunk 2077 Katana Build (2.0): Stats, Abilities, Gear, and Cyberware
Can You Put a Silencer on Skippy?
Skippy cannot have a silencer attached to it at all. This is because it is a Smart weapon. Both Tech and Smart weapon types won’t take any silencers, but they can sometimes have scopes added. However, Skippy doesn’t have any attachment slots as part of what you can upgrade, so you will be out of luck.
Nonetheless, once you have acquired Skippy, it is going to become a likely constant in your arsenal thanks to its powerful but also humorous nature. The pistol actually talks to the player at points, making it a brilliant novelty-like pick. I would recommend that you go and get Skippy at some point during your journey.
How to Install Weapon Mods in Cyberpunk 2077
Attachments can be swapped in and out as you need, but mods are one-time-use upgrades for a weapon, perfect for certain builds, and even the Lucy build from Cyberpunk Edgerunners. The method to attach a mod is the same as above. Here’s how to install weapon mods in Cyberpunk 2077 without much hassle. Just open your inventory, navigate to the weapons, and select the gun you want to attach mods to. Look at the “Mods” section and select the open slot to bring up the menu.
In the new menu, you will see all of your available gun mods. Scroll through and pick which one works best for this weapon, but keep in mind that you can’t remove it later. Otherwise, it’s the same as the attachments we explained above. The item will upgrade your weapon with whatever stat or effect it describes. Just be sure not to slap a mod onto any of your early guns since you’ll probably find better stuff later on.
Can You Stack Weapon Mods in Cyberpunk 2077?
Weapon mods can be stacked, and stacking mods such as Crit Chance or Crit Damage will prove to be highly beneficial. If you want to maximize your build to the greatest degree, taking advantage of this is always worthwhile. Although, as mods can’t be removed, be sure you’re making the correct choices for what you’re personally looking for from a weapon.
Now that you know how to install weapon mods in Cyberpunk 2077, along with attaching silencers and scopes you can thrive in Night City with a fresh, upgraded arsenal. You might even be ready to start farming Tier 4 Item Components. Time to get back into the streets once again, Choom!
]]>Starfield: Preparing the Ship for Grav Drive in the First Contact Mission
There are three computers you need to interact with to prepare the ECS Constant with a Grav Drive for the ‘First Contact’ quest in Starfield. I found this mission to be complicated at first, but you won’t have any trouble following this guide.
Engineering Control Computer Alpha – Turbopump Port
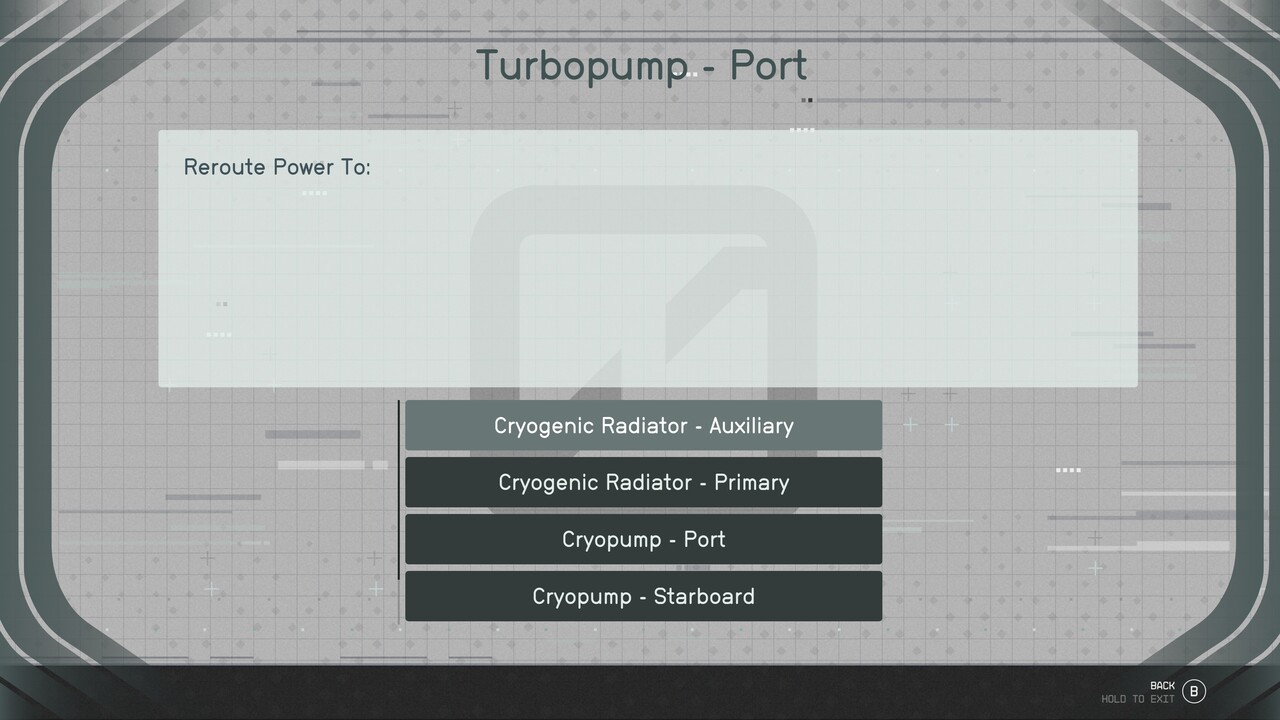
The first step in the mission to prepare the Grav Drive is to reroute power from the Port Turbopump to the Auxillary Cryogenic Radiator. To do this, go to Engineering Control Computer Alpha and select Turbopump — Port first and Cryogenic Radiator — Auxiliary second, and you’re good to go.
Engineering Control Computer Beta – Plasma Run-Off Inhibiter
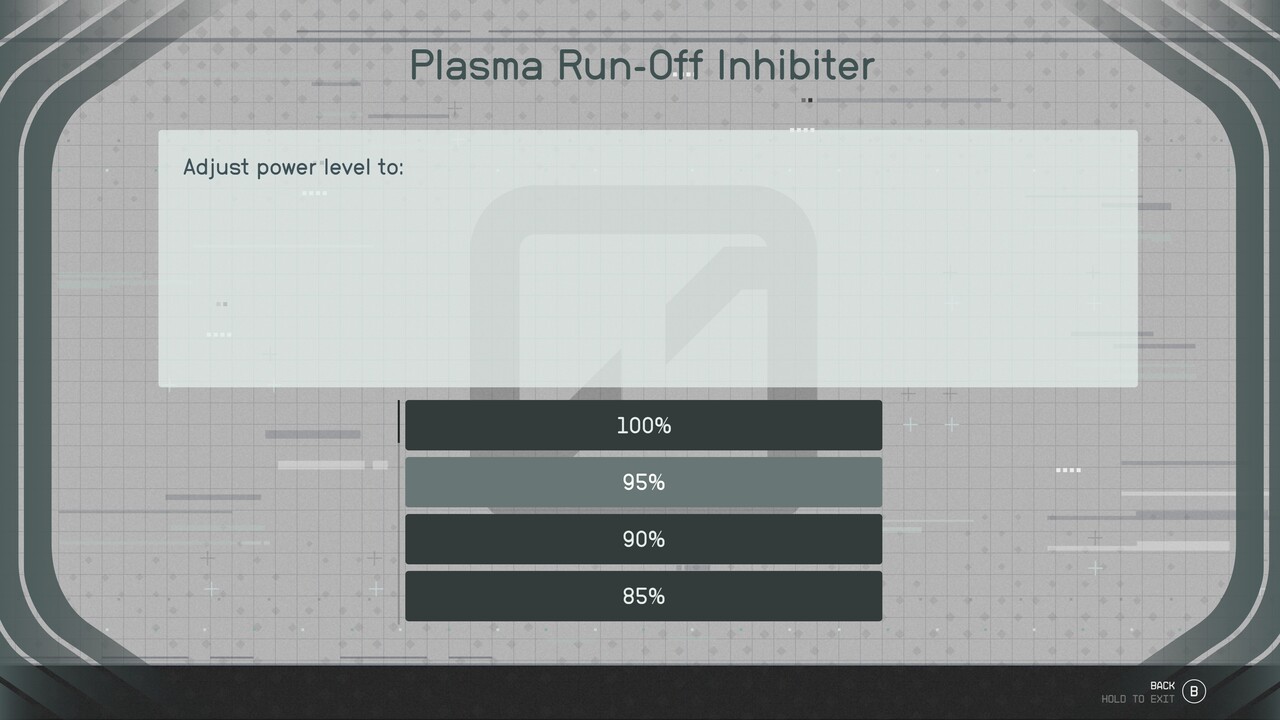
Next up, you need to adjust the power level of the Plasma Run-Off Inhibiter to the correct level at the Engineering Control Computer Beta. To complete this step, choose the Plasma Run-Off Inhibiter from the list and set it to 95%.
Engineering Control Computer Gamma – Magnetic Flange Pipe Enclosures
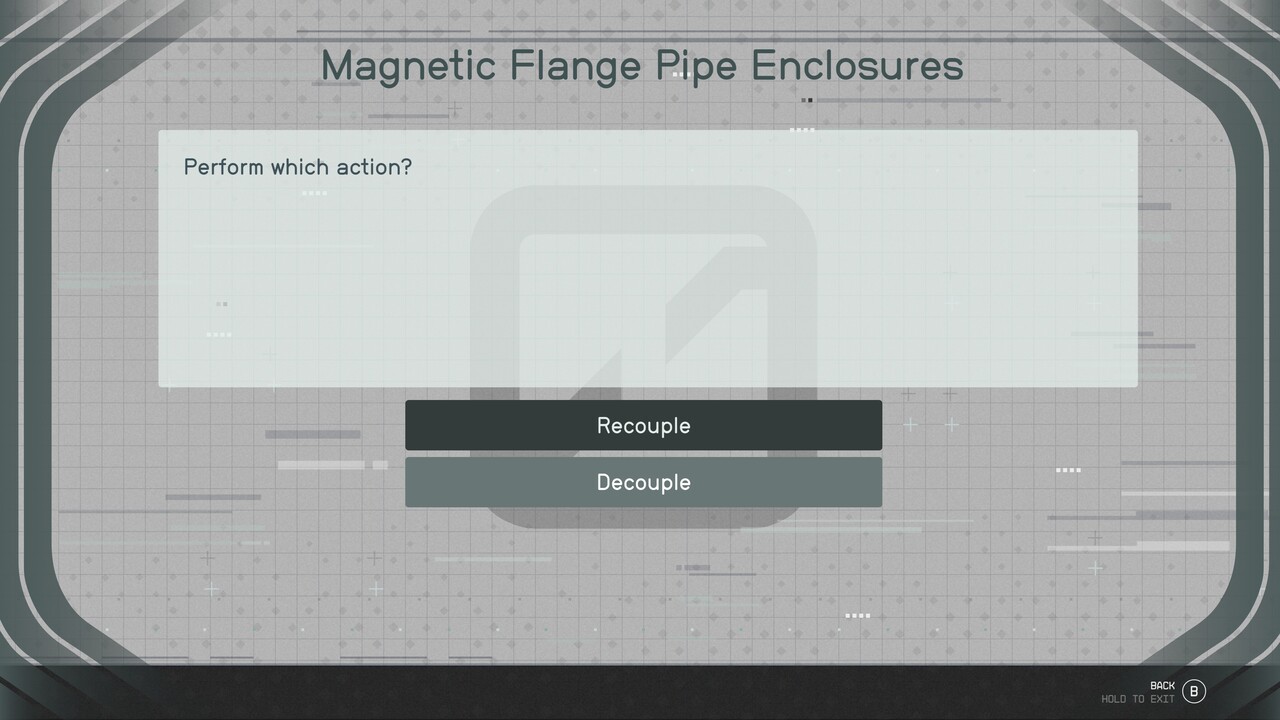
Lastly, you need to decouple the Auxiliary Module Assembly from the Magnetic Flange Pipe Enclosures. Use Engineering Control Computer Gamma and select Auxiliary Module Assembly. From there, choose to decouple and then select the Magnetic Flange Pipe Enclosures. That’s all you need to do!
Related: What Do Red Health Bars Mean in Starfield?
This quest seems much more complex on paper than it is in practice. If you ever forget what you need to do, all of the steps are in your quest log, so don’t hesitate to check your journal if you need a refresher.
There’s also no penalty for choosing the wrong options, so you can always go back and correct your mistakes if the quest doesn’t advance to the next step. I got the steps wrong multiple times, but thankfully, nothing happened, and I could go back and make the correct adjustments.
Once you’ve set everything to the correct levels and decoupled the right parts, the quest will automatically continue to the next step. At this point, the First Contact quest is nearly over! There are just a few more people to talk to before you can cross this one off your list.
Is There a Different Ending if You Don’t Take the Grav Drive Path in Starfield?
There are three endings for the First Contact mission. There are three dialogue options at the end of the mission that can change the ending you get. Here are all the dialogue options.
- Help the crew settle in Paradiso by providing some extra resources.
- Equip the Constant with a Grav Drive for them to settle somewhere else.
- Destroy the Ship.
Naturally, these are conflicting options. The ECS Constant encountered Paradiso after an enormously long voyage, and it’s simply a sad coincidence that somebody settled there first. Helping them settle seems appealing, but sending them on a new mission to settle elsewhere is a worthy compromise once you can persuade them.
First Contact Mission Rewards in Starfield
If you choose to settle the crew on Paradiso, you will get rewarded with the following items:
- .45 Caliber ACP x30
- Antique Earth Baseball x2
- Antique Earth Basketball
- Antique Earth Hockey Stick x3
- Antique Earth Soccer Ball x2
- Antique Piggy Bank
- Modified XM-2311
If you choose to send the crew on a new voyage with their new Grav Drive, you will be rewarded with the following items after completing the quest:
- .45 Caliber Acp X30
- Antique Earth Baseball x2
- Antique Earth Basketball
- Antique Earth Hockey Stick x3
- Antique Earth Soccer Ball x2
- Antique Piggy Bank
- Grav Drive Retrofit Manual
- Modified XM-2311
Destroying the ship will only reward you with Credits after completing the First Contact quest:
- 6500 Credits
What is the Best Option in Starfield’s ‘First Contact’ Mission? – Grav Drive, Settle on Paradiso, or Destroy the Ship?
The first or the second are equally reasonable choices. I don’t recommend the third option, which only rewards you with 6,500 credits. Unless you’re in dire need of some cash, 6,500 credits is pretty underwhelming.
There isn’t too much reason not to choose one of the other options, as you will be getting a free weapon from them in the process. Plus, who doesn’t love a good antique baseball every once in a while? You can even keep it on your desk like Captain Sisko.
Related: Here’s Why Starfield Requires an SSD on PC
Now that you know what to choose for the First Contact quest, you can hop back into the galaxy and do some exploring of your own. If you’re looking for a new ride to scour the galaxy, check out our article on the best ships in Starfield.
]]>This article will take you through exactly how to build Link’s Home in The Legend of Zelda: Tears of the Kingdom.
Getting Link’s House in Zelda Tears of the Kingdom
There are a few steps you will have to go through first before you can get Link a home in the kingdom. I have found it won’t take too much time, but still set yourself one to two hours aside for this one as there is a material collection process involved in the form of some flowers. Without further ado, here is all you need to do to get Link a house.
Complete Mattison’s Independence Side Adventure
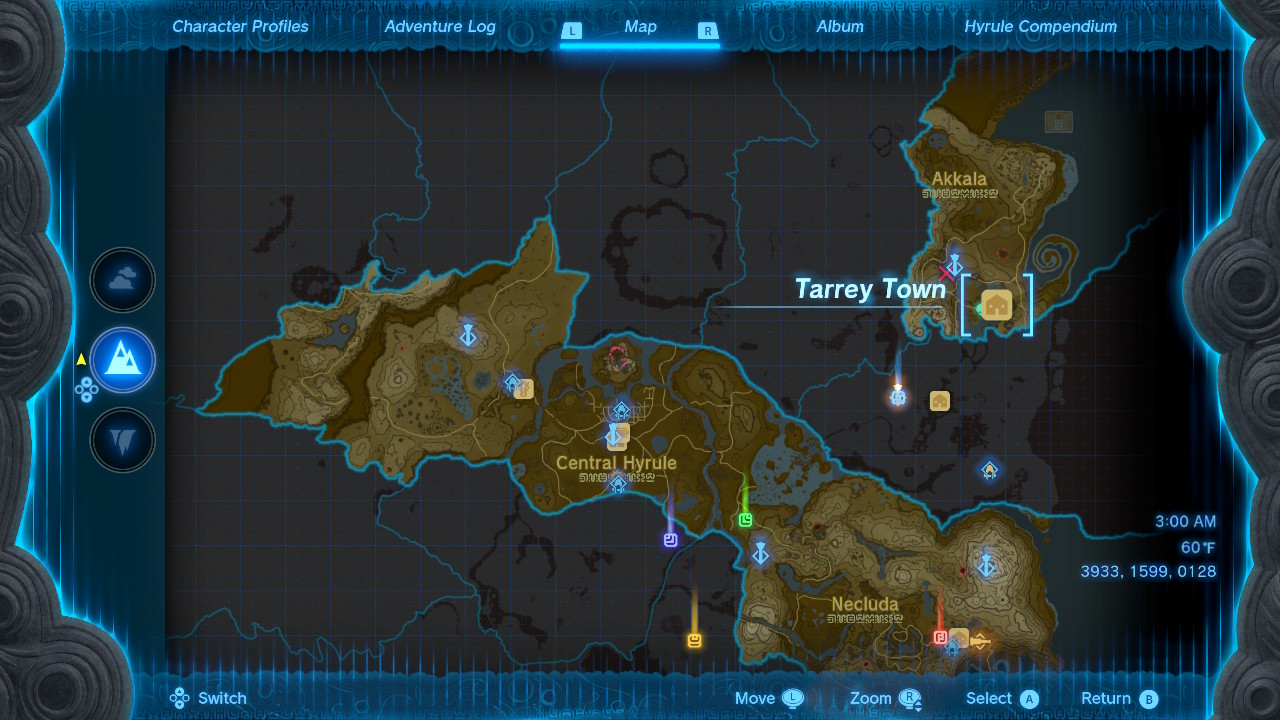
To begin your adventure, you’ll need to find Tarrey Town in the Northeast corner of the map and begin Mattison’s Independence side adventure. Mattison is Hudson’s daughter and he and his wife, Rhondson, are preoccupied with preparing for her to leave for Gerudo Town. First, talk to Hudson and Rhondson while they are talking together at the Hudson Construction counter, then talk to Hudson separately.
Related: How to Find Zelda’s Secret Room in Zelda Tears of the Kingdom (ToTK)
After, you can go back to where Rhondson is and ascend into Mattison’s room where you will find a diary that lists Gerudo words Mattison is trying to memorize, keep note of these. In the morning, Mattison will be with Grandma Monari to teach her Gerudo and you will need to answer the right Gerudo word. This makes her feel as though she has helped her mom feel happy while she is gone and sets off on a mission to the construction site so she can help her dad, too.

To get to the construction site, she has to sneak by Hagie to use the rail without paying. You help her do this by finding a piece of wood leaning against the house across from him and blocking his vision with it so she can cross.
Related: What Carries Over from BotW to Zelda Tears of the Kingdom?
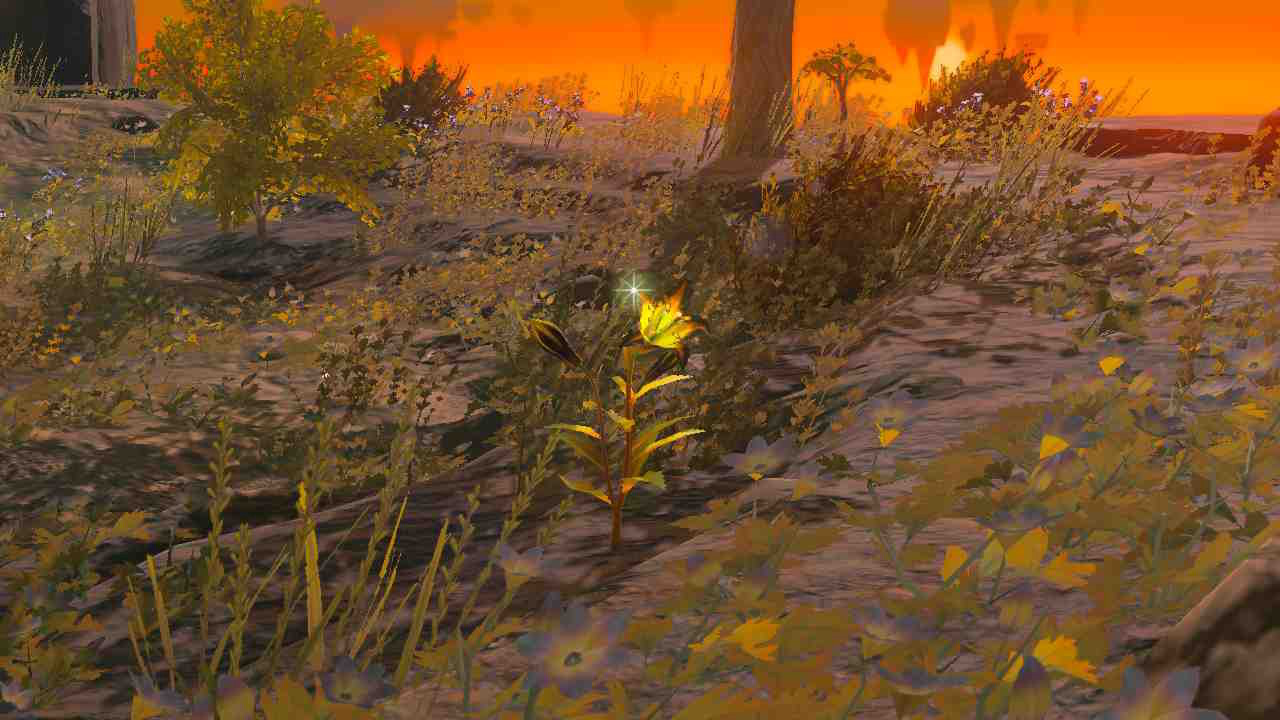
Once she gets there, Hudson talks about a balloon he made for Mattison and wants to make it yellow but needs ten Sundelions to do so. I recommend just floating around to different sky islands to collect them. I personally went to Lindor’s Brow Skyview Tower and floated to the sky island southwest of the tower and found all the Sundelions needed, plus a shrine, and a new armor piece on one island.
How to Get Link’s House Built in ToTK
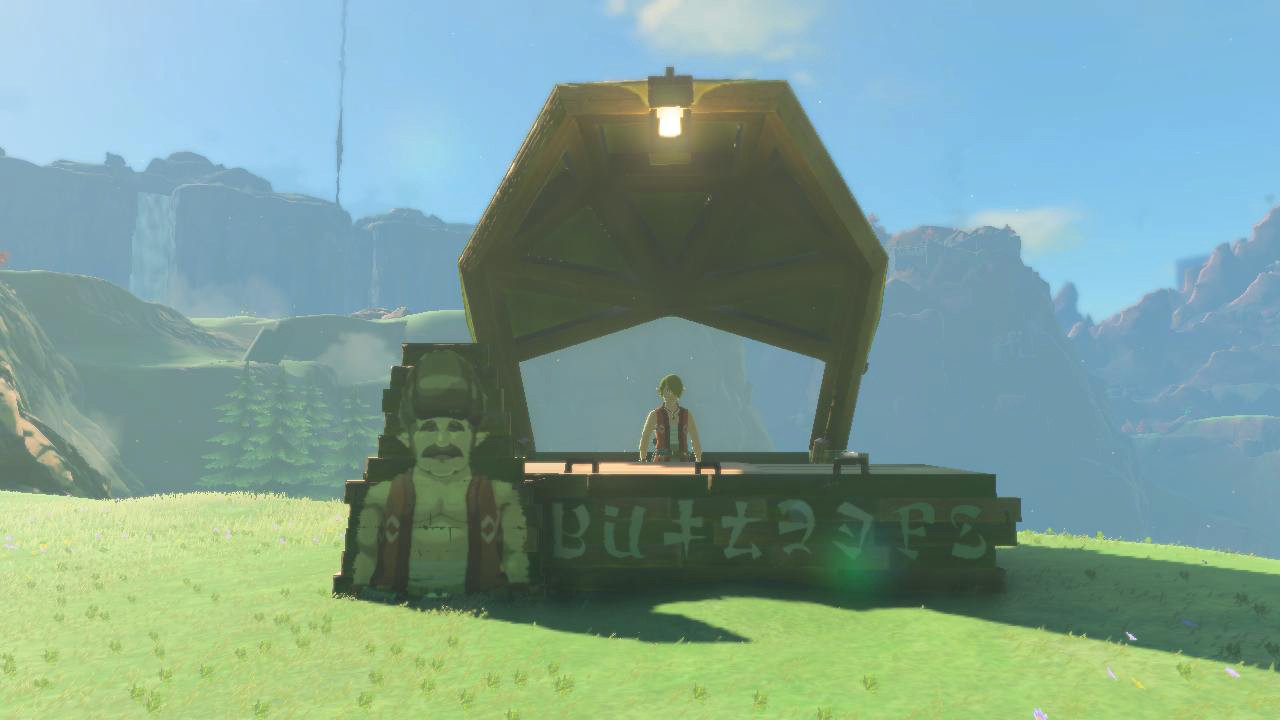
Once you’ve given the sundelions to Hudson, the Mattison’s Independence adventure is over and the couple begins taking construction requests for dream homes. Talk to Rhondson at the counter of Hudson Construction and she will walk you through the whole idea of the dream home building. Then select “A dream home, please!” But be ready to pay 1,500 rupees to start. This unlocks the Home on Arrange quest.
At the top of the hill, if you follow the path outside of Tarrey Town, then South, you’ll see a plot of land and a construction booth waiting for you. Talk to Granteson and he’ll get you started with building your home. At the very beginning, you’ll only have two rooms available, a bedroom and a foyer, but you can purchase more as you get more rupees. To build, use the Ultrahand ability to move and attach your rooms together however you’d like.
Other Building Options for Link’s Home
After you build your initial home, there are 16 more building options, as well as additional foyers and bedrooms available to customize Link’s home with.
- Flower Bed – 250 rupees
- Study – 250 rupees
- Angled Room – 300 rupees
- Foyer – 300 rupees
- Garden Pond – 300 rupees
- Outdoor Stairs – 300 rupees
- Indoor Stairs – 350 rupees
- Square Room – 350 rupees
- Bedroom – 400 rupees
- Blessing Room – 400 rupees
- Furnished Angled Room – 400 rupees
- Gallery – 400 rupees
- Kitchen – 400 rupees
- Paddock – 400 rupees
- Furnished Square Room – 450 rupees
- Bow Stand Room – 600 rupees
- Shield Stand Room – 600 rupees
- Weapon Stand Room – 600 rupees
Can You Get More Than 15 Rooms in Zelda Tears of the Kingdom
No, it is not possible to have more than 15 rooms in The Legend of Zelda: Tears of the Kingdom, which can be a slight frustration to some I have found on various forums. This makes sense as there are 18 room types, but instead, you can only have just 15. This means you will have to be selective of whichever you decide to include in your build.
Related: Hebra Tabantha Hills Dragon Tear Location in Zelda Tears of the Kingdom (TOTK)
Nonetheless, at least you now know how to get started with building Link a home so you can have somewhere comfortable to rest. I personally enjoy having the Garden Pond room for a serene experience relaxing. Time for you to jump back in and start the full process for yourself, best of luck!
]]>This article will take you through everything we know about the Phasmophobia console release date.
When Does Phasmophobia Release on Consoles?
The console release for Phasmophobia has been postponed, so PlayStation 5 and Xbox Series X|S players hoping for a chance to play the game have to wait longer. A revised release date window was not given. The originally planned release window was the week leading up to Halloween in 2023, but there were several factors cited in their mid-October news post including:
- Continuing to adjust after the fire incident caused August’s delay.
- Setting up a new office.
- Additional challenges balancing the experience for PSVR2 players.
- Reworking the Maple Lodge Campsite with a new reception office area, hiding spots, and performance improvements.
Related: All Equipment Tiers in Phasmophobia
Phasmophobia was initially planned to hit consoles in August 2023. Due to an unfortunate fire incident at Kinetic Games’ office, the release date was pushed forward two months to ensure a smooth launch. Since then, there has been a further update in the form of a Steam blog in January which showcases that the game is still in development for consoles.
It should be noted people have also wondered if a Phasmophobia PS4 version will exist and this is answered below along with other consoles.
Is Phasmophobia Delayed On PlayStation 5?
Yes, Phasmophobia is delayed for PlayStation 5 but it is coming, alongside Xbox Series X and Series S. For console players, I recommend you’ll want to learn how to use the DOTS Projector and the other ghost-hunting tools.
Will Phasmophobia Release for PSVR2?
As mentioned earlier, Phasmophobia is coming to PSVR2 as well! I know that Phasmophobia VR is a truly terrifying experience; it’s not for the faint of heart. While other Phasmo clones have sprouted up in recent months to years, few have this level of continuous support to reach the wider player base like Phasmophobia.
Is the Console Version of Phasmophobia Crossplay?
The PS5 and Xbox Series versions of Phasomophobia will have the option to enable crossplay. This means that no matter which platforms your friends choose, you can all play together. Horror games are always better with friends, and Phasmophobia is no anomaly.
Is Phasmophobia Coming to Xbox One and PlayStation 4?
Phasmophobia isn’t coming to PlayStation 4 or Xbox One consoles. There will be no Phasmophobia PS4 version. I know this may come as disappointing news, but I’m looking forward to playing Phasmophobia on other consoles soon. We aren’t sure if it’ll be on Xbox Game Pass yet or exactly how much it’ll cost. It currently costs $13.99 on Steam, so expect a similar price on Xbox Series X|S and PS5 when it does eventually release.
]]>Like many other shonen franchises with long-running, epically proportioned storylines, Fairy Tail has been running for the better part of the last two decades, officially beginning in 2006 as part of Kodansha’s Weekly Shonen Magazine.
The best way to read every Fairy Tail arc, in order
Fairy Tail follows Natsu Dragneel, Lucy Heartfilia, and other important members of Fairy Tail, one of the most powerful wizard guilds in the world. The story goes through several different story arcs that develop the eccentric cast of characters, the guild, and the world they inhabit, all while dropping hints about the mysterious Zeref and the age of dragons, two of the main plots during the latter half of the series original story line.
The current arc follows the sequel series, Fairy Tail: 100 Years Quest, using the same cast of main characters trying to complete the impossible mission known as the “100 Years Quest”, which will be receiving an anime adaptation during the Summer 2024 anime season by studio J.C. Staff.
| Fairy Tail Story Arc | Manga Chapter | Anime Episodes |
| Zerø arc | Chapters 1-13 (whole Fairy Tail Zerø manga) | Episodes 266-275 |
| Macao arc | Chapters 1-3 | Episodes 1-2 |
| Daybreak arc | Chapters 4-9 | Episodes 3-4 |
| Eisenwald arc | Chapters 10-23 | Episodes 5-10 |
| Sub-Zero Emperor Lyon arc | Chapters 24-46 | Episodes 11-20 |
| Phantom Lord arc | Chapters 47-69 | Episodes 21-29 |
| Loke arc | Chapters 70-74 | Episodes 30-32 |
| Tower of Heaven arc | Chapters 75-102 | Episodes 33-40 |
| The Battle of Fairy Tail arc | Chapters 103-130 | Episodes 41-51 |
| Oración Seis arc | Chapters 131-164 | Episodes 52-68 |
| Daphne arc | Episodes 69-75 (Filler arc) | |
| Edolas arc | Chapters 165-199 | Episodes 76- 95 |
| Tenrou Island arc | Chapters 200-253 | Episodes 96-122 |
| X791 arc | Chapters 254-257 | Episodes 123-124 |
| Key of the Starry Sky arc | Episodes 125-150 (Filler Arc) | |
| Grand Magic Games arc | Chapters 258-340 | Episodes 151-203 |
| Eclipse Celestial Spirits arc | Episodes 204-226 | |
| Sun Village arc | Chapters 341-355 | Episodes 227-233 |
| Tartaros arc | Chapters 356-417 | Episodes 234-265 |
| Avatar arc | Chapters 418-437 | Episodes 276-284 |
| Alvarez arc | Chapters 438-545 | Episodes 285-328 |
| 100 Years Quest arc | Chapters 1-Ongoing | TBD |
As can be seen above, Fairy Tail is an expansive franchise, and one of the longer running shonen epics. Something that’s also important to note when looking at the differences between the anime and manga is that the original anime adaptation, which was handled by A-1 Pictures, Dentsu Entertainment, and Satelight.
What is the longest arc in Fairy Tail?
The longest full existing arc in Fairy Tail is the Alvarez Arc with 107 chapters in the manga, although, the longest arc in the anime is the Grand Magic Games arc with 52 episodes compared to Alvarez’s 43 episodes.
We recommend following the Fairy Tail arcs in order, but for those who want the most comprehensive experience of the series. There is a lot to get through; it will be worth it in the long run if you think you will really enjoy the world-building and characters.
Why did Fairy Tail have a time skip?
Warning: The following section contains major spoilers for the rest of the series!
There was a seven-year time skip due to events in the X791 arc which involved the main cast being trapped in a frozen-like state for seven years. This happened a long time ago, showcasing just how long Fairy Tail has actually been running.
Now that you know all of the Fairy Tail arcs you are prepared to go and experience this series for yourself, especially with the series finally making a big comeback this summer with the 100 Years Quest arc finally getting animated and reigniting what fans’ love about the franchise.
]]>This article will take you through exactly how to get into a polyamorous relationship in Baldur’s Gate 3 with your companions.
- How to Romance Multiple Companions in Baldur’s Gate 3
- All Known Polyamorous and Nonogamous Companions in Baldur’s Gate 3
How to Have a Poly Romance in Baldur’s Gate 3
Romancing multiple companions in Baldur’s Gate 3 isn’t much different than romancing just one. To initiate a BG3 poly romance with two of your companions, you’ll need to ensure that you’ve gained enough favorability with all your potential partners that they’re open to entering a relationship with you. This can be done by choosing the correct dialogue options during your one-on-one interactions with them and making choices they agree with while avoiding dialogue and decisions that might alienate them.
The best way I have found to lay the groundwork for a polyamorous relationship is to focus on romancing the companion that you’re most interested in while taking some time to establish a good rapport with the other direction of your affection.
Once you’ve earned the admiration of both parties, you can speak to one of your potential partners in your camp and bring up the idea of inviting the other companion you’re interested in to join in on your romantic endeavors. The dialogue option will be worded differently depending on who you’re trying, but the choice should be easy to pick out from the crowd.
All Polyamorous and Nonogamous Companions in Baldur’s Gate 3

It’s important to note that not all companions are open to being in a polyamorous relationship, even if they get along well with the other. Here are all of the companions who would rather keep their romantic relationship with you monogamous in Baldur’s Gate 3.
- Gale
- Wyll
While the rest of the companions are open to being in a polyamorous relationship, they aren’t willing to be in one with some other companions, no matter how hard you try to convince them. Alternatively, I have noticed some companions who start eager to be with you and someone else but will change their minds as their relationship with you deepens.
Players are still discovering new depths to Baldur’s Gate 3’s romance system, but here are all the interpersonal complications that could come into play as you try to form a polyamorous relationship we’ve encountered so far.
- Shadowheart is open to being in a polyamorous relationship with you and someone else in Act One as long as it’s not Lae’Zel. However, she will want to transition to a monogamous relationship in Act Two.
- Astarion is open to a relationship with you, Halsin, and Minthara. He is also available, albeit somewhat reluctantly, to be in a relationship with you and Shadowheart until she decides she wants a monogamous relationship.
- Karlach is open to being in a polyamorous relationship with you and someone else but also decides that she wants to be monogamous.
- Halsin and Minthara are open to entering into a polyamorous relationship with you if they get along with their other partner.
As in real life, a polyamorous relationship in Baldur’s Gate 3 can only survive if all parties respect each other’s feelings and adjust to change. Baldur’s Gate 3’s romance system perfectly captures the effort needed to maintain a polyamorous relationship and the joy it can bring to everyone involved, and it’s a significant step forward in romantic representation in video games.
How to End a Relationship in Baldur’s Gate 3
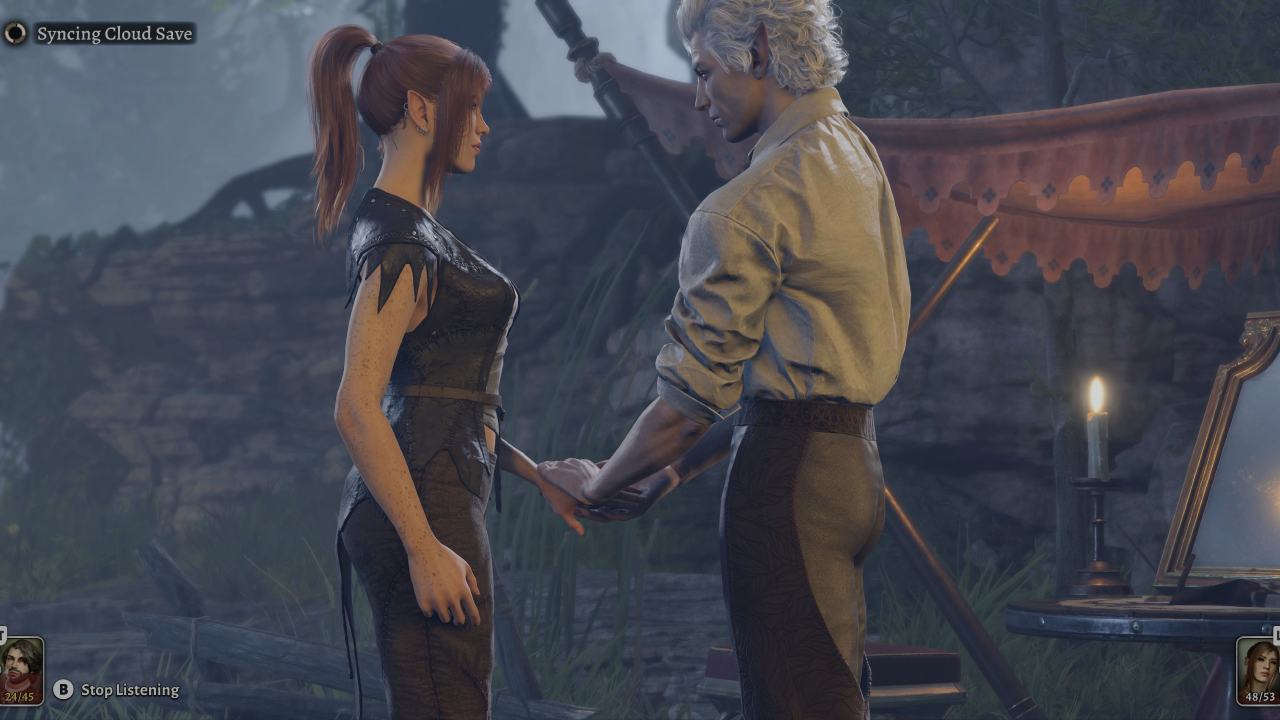
If you went down the Polygamy route and have maybe changed your mind on the whole ordeal — there is a way to end a romance. Players can end a relationship with another character by selecting the correct dialogue options during regular conversations or in the middle of romance cutscenes.
For the former, sometimes, when you are speaking with the character(s) you are romancing, an option will appear that says, “Let’s talk about us.” Or sometimes it will read, “I want to talk about our relationship.” Once you select this, you will have the option to end it for good.
It’s important to note that players have reported that this dialogue option doesn’t always appear, meaning it may only become available if you have been in the relationship for a certain amount of time. Just keep an eye out for these dialogue choices during romance cutscenes and when speaking with your romance partner.
Now that you know how to have a BG3 poly relationship, you can get back into the game and decide to do this if you wish.
]]>You may of course wonder when the Final Fantasy XIV graphics update will be released and this article will take you through just that, along with the key details.
When Does the FFXIV Graphics Update Release?
The FFXIV graphics update will be released alongside the launch of Dawntrail which is currently scheduled for Summer 2024. There will be plenty of other content on the way with the expansion but the graphics update will no doubt be a highly-anticipated inclusion, though sentiment is mixed based on official forum discussions. I know I am highly looking forward to walking through Eorzea with all of the graphical enhancements.
There isn’t much you can do in the meantime to upgrade the existing graphics in the game apart from playing around with your computer settings and in-game graphics settings. One thing that I recommend is using the Gamma Correction slider and adjusting it until you get a nice blend of light and dark which will add to the overall atmosphere of the world.
Graphics Update Explained for FFXIV
The graphics update itself is quite simply what the name implies: a large graphical update for Final Fantasy XIV. Attack of the Fanboy has personally made a comparison article of the graphics that were viewed in the showcase of the update. It isn’t just environments that will get an update but character models, shadows, armors, and much more. Given the game was released back in 2010, the graphics update is a much-needed fresh coat of paint to bring the popular MMO into the modern day from a visual perspective.
Now that you know when the Final Fantasy XIV graphics update will be released, you can prepare for diving into Eorzea with a whole new graphical light.
]]>The rules can be devilishly difficult as time goes on. I will take you through all the rules in The Password Game and how to solve them.
How to Complete Every Rule in The Password Game
To win The Password Game, you must create a password that adheres to all 35 rules the game throws at you. Not only are the answers to many of the rules extremely unorthodox, but many of them directly require solutions that contradict those of preceding rules, which can force you to drastically alter your password in a way that follows multiple rules simultaneously.
Below you will find an explanation of every rule in The Password Game and the strategies we used to create the ultimate password.
Rule 1: Your Password must be at least five characters
Most of The Password Game’s early rules are something you would run into while making a new password in real life, and the first is no exception. To progress, type a five-character-long password into the input box. While you can make it longer, I recommend keeping it short because a shorter password will be much easier to work with than a long one.
Rule 2: Your password must include a number
This is another easy one. All you have to do is add a single number to your password if you haven’t already. I recommend using eight since it will make following Rule 5 much more manageable.
Rule 3: Your password must contain an uppercase letter
Another easy one. If you haven’t already typed an uppercase letter into your password, do so now. I would avoid adding any vowels if I were you, though, because following another rule will be easier if you don’t have more than one vowel.
Rule 4: Your password must include a special character
This is The Password Game’s last remotely standard rule, so enjoy it while it’s here. Add one of the many special characters on your keyboard to follow it. Here is a list of all the ones that count;
- !
- @
- #
- $
- %
- ^
- &
- *
- (
- )
- –
- _
- =
- +
- {
- }
- [
- ]
- ””
- “”””
- ;
- :
- ?
- /
- >
- <
- ,
Rule 5: The digits in your password must add up to 25
Rule 5 is where The Password Game starts to get tricky. The numbers in your password have to add up to 25 before you can progress. I used 889 during my run because it is the shortest equation that adds up to 25. Please don’t get used to it, though, as later rules require adding more numbers to your password.
Rule 6: Your password must include a month of the year
This rule is self-explanatory, but you should be careful before you choose what month to put in your password. I recommend May since it’s the month with the fewest letters in its name and will keep your password from getting too long. It should also contain one of the few vowels in your password.
Rule 7: Your password must include a Roman numeral
Roman numerals have not been the dominant number system since the Middle Ages, but they aren’t hard to figure out if you do a little research (or have watched the Star Wars films). I recommend typing the Roman numeral for 1, I, into your password since it, V (5) and X (10) are the only Roman numerals to be only one letter.
Rule 8: Your password must include one of our sponsors
Rule 8 is where The Password Game starts incorporating images into its rules. Once you’ve reached it, a photo will appear showing one of three “sponsors,” Pepsi, Starbucks, and Shell. You can progress by typing the name of one of these companies into your password. I would recommend Pepsi since it’s the easiest to remember
Rule 9: The Roman numerals in your password must multiply to 35
Rule 9 asks you to create another math problem that ends in a specific solution, with the additional caveat of working with Roman numerals. The easiest way to solve this rule is to type the Roman numeral for 35, XXXV. Remember to put the I before the XXXV and capitalize all your digits. Otherwise, they won’t count.
Rule 10: Your password must include this CAPTCHA
After you’ve reached Rule 10, an image will appear containing a random sequence of numbers and letters. This is called a CAPTCHA, and you’ve probably run into one while making a new password or after failing to log onto a website a few times. Type the CAPTCHA into your password, and you can move on.
Rule 11: Your password must include today’s Worlde answer
Wordle is a word-based puzzle game that gives you a few tries to guess the randomized word of the day, giving you a hint with every incorrect answer. To follow Rule 11, you must type the solution to today’s Wordle Riddle into your password. Wordle puzzles usually aren’t to solve, and you can generally look up the answer to any given day’s riddle by checking the Internet.
Rule 12: Your password must include a two-letter symbol from the periodic table
The Periodic Table is a list containing the chemical symbol of every element known to man, and you have to type one of these two-letter symbols into your password to solve Rule 12. Any chemical symbol from the Periodic Table will do, but I recommend picking a memorable one like Au, the symbol for gold.
Rule 13: Your password must include the current face of the moon as an emoji
As its description implies, Rule 13 is the first of several rules in The Password Game that requires you to type emojis into your password. We have a great article on how to beat Rule 13, so check it out if you want to know how to move on.
Rule 14: Your password must include the name of this country
Rule 14 is another rule that requires you to incorporate information from a photo into your password. You will be shown a photo taken in a random country, and it’s up to you to determine where it’s from. Once you know where the photo was taken, add the country’s name to your password.
Rule 15: Your password must include a leap year
To follow Rule 15, add a leap year to your password. Leap years have an additional date, February 29th, which occurs four years or so. The nearest leap year is 2024, so feel free to plug it into your password.
Rule 16: Your password must include the best move from algebraic chess notation
Rule 16 is widely regarded as the most brutal rule in The Password Game, and it’s entirely because very few people know what algebraic chess notation is, let alone how to play it. That includes me. Fortunately, we have a great article showing you how to calculate the best algebraic chess notation move for your password, so check it out!
Rule 17:  This is my chicken Paul. He hasn’t hatched yet. Please put him in your password and keep him safe.
Rule 17 is another rule that requires you to add an emoji to your password. To follow it, do as the textbox asks and put Paul into your password by either copy-and-pasting the emoji or putting on in yourself. You’ll want to put Paul at the start of your password for reasons that will become apparent very soon.
I think this is one of the most humorous rules in the game and as noted, it can catch you by surprise later on.
Rule 18: The elements in your password must have atomic numbers that add up to 200
Rule 18 requires more thought than many other rules since it accounts for all of the letters that could correspond with atomic numbers in its solution. Thankfully, there is an easy way to figure out how to make the value of your atomic numbers equal to 200. Atomicnumber.net has a complete list of the elements and their atomic numbers, so feel free to consult it and get the numbers you need to move on.
As an example of atomic numbers corresponding to letters that add up to the correct total, here are some letters you can have for it to add up to 200.
- C — 6
- B — 5
- N — 7
- Og — 118
- Gd — 64
Rule 19: All the vowels in your password must be bolded
This rule is self-explanatory. All of the vowels in the password need to be bolded so do this and then you’re all set. The vowels are a, e, i, o, and u so all you have to do is ensure they are properly bolded.
Rule 20: Oh no! Your password is on fire . Quick, put it out!
When you reach Rule 20, a bunch of fire emojis will appear in your password and slowly spread out. We already have a guide on how to put out the fire emojis and protect Paul, so pop in and learn how to keep your password from going up in flames. If Paul is fried, you must start The Password Game over from the beginning.
Rule 21: Your password is not strong enough 
Rule 21 is another rule that asks you to stick an emoji in your password. Just copy and paste the strongman emoji in the text box into your password to give it the strength to pass this test.
Rule 22: Your password must contain one of the following affirmations: I am loved|I am worthy|I am enough
Rule 22 is a moment of calm within the storm and a chance for The Password Game’s developer Neal Agarwal to prove that he’s not a complete monster. If the stress of crafting the ultimate password has gotten you down, feel free to take a moment to calm down and recenter yourself. Once you’re ready to move on, type one of the affirmations into your password.
Rule 23: Paul has hatched ! Please don’t forget to feed him. He eats three
  a minute.
Rule 23 asks you to care for Paul like he is your pet. To feed him, type three worm emojis into your password. Paul will eat them for over a minute, and you must keep providing for him until the end of the game. If you don’t feed him (or try to cheat by giving him more than three worms), he will die, and you’ll have to start the game again from the start.
Rule 24: Your password must include the URL of a YouTube video of this exact length
Rule 24 will bring up a random number and challenge you to scour the archives of YouTube to find a video whose length matches the number. The number is random, so you’ll have to search and hope you get lucky.
Rule 25: A sacrifice must be made. Pick two letters that you will no longer be able to use
Rule 25 is many things, but a liar is not one of them. You cannot use the two letters in your password again once you “sacrifice” them. Choose wisely.
Rule 26: Your password must contain twice as many italic characters as bold
I hope you were keeping track of how many vowels you bolded. You can move on once you’ve italicized double the letters you bolded.
Rule 27: At least 30% of your password must be in the Wingdings font
Wingdings is one of the oldest font languages in computing, and you’ll need to convert a good chunk of your password to it to clear Rule 27. You must copy and paste whatever constitutes 30% of your password into a Wingdings font translator, then put it back in.
Rule 28: Your password must include this color in hex
Once you’ve made it to Rule 28, you’ll be presented with a color that you’ll have to translate into a corresponding hexadecimal color. To do this, memorize your color and figure out its hexadecimal number using a program like Paint. Once you’ve got that, translate it into Color Picker, giving you a corresponding hex color to add to your password.
Rule 29: All Roman numerals must be in Times New Roman
To clear Rule 29, use the font change button in the text box to change all Roman numerals to the Times New Roman font.
Rule: 30 The font size of every digit must be equal to its square
To find the square of every number in your password, multiply it by itself. From there, use the font manager to change the number’s font size to that of its square. I recommend having an online calculator open in a new tab for this so you can keep referring back and checking.
Rule 31: Every instance of the same letter must have a different font size
Use the font generator to give every letter in your password a unique font size. There’s no easy way out on this one; you’ve got to do it letter by letter.
Rule 32: Your password must include the length of your password
This one is a lot easier than it sounds. The size of your password is next to the textbox, so copy and paste it into your password while adjusting for the change it will make to the number.
Rule 33: The length of your password must be a prime number
Prime numbers are any number whose only multipliers are itself and 1, and the chance of a number being a prime gets higher the bigger it is. If your password is not already the length of a prime number, it shouldn’t be hard to find a list online.
Here’s a complete list of Prime numbers up to 100: 2, 3, 5, 7, 11, 13, 17, 19, 23, 29, 31, 37, 41, 43, 47, 53, 59, 61, 67, 71, 73, 79, 83, 89, 97
Rule 34: This rule is skipped!
Self-explanatory.
Rule 35: Your password must include the current time
Last rule! Copy and paste the current time into your password, and do whatever work you need to ensure all 35 rules are covered.
How to Finish the Password Game
Once you’ve made a password that follows all 35 rules, you will be asked to confirm if this is your password. Copy the entirety of your password before you click yes. Once you’ve confirmed your password, you will have 120 seconds to retype it. If you fail, you will have to start over from scratch. If you succeed, then congratulations! You’ve won The Password Game!
Now that you know how to complete all of the rules with precision, even the unexpected “All vowels in your password must be bolded” rule, you can jump back into the website and finish the game for yourself.
]]>I know this can put a dampener on any situation if you think there’s a chance of losing some support from your fellow villagers in LEGO Fortnite.
Can Villager Tools Break in LEGO Fortnite?
Yes, villager tools will break just like yours. A small bubble will appear next to them with a broken tool symbol and a red exclamation mark. The broken pickaxe symbol in LEGO Fortnite is shown below, so when you see this, it will be clear that the tool is broken.
Related: How to Fix Hunger Bug in LEGO Fortnite
The only reason it happens less commonly than it does for your equipment is that villagers use tools at a slower pace, meaning fewer swings against a given target.
While this can be frustrating, it adds a dynamic of team management to your survival playthroughs, and you’ll want to keep track of your villager’s equipment. If it’s been a while, consider crafting a secondary tool of your choice in case they need one. Keeping a check on tool durability for restoring will always be extremely important, so I recommend constantly having a backup plan.
How to Give Villagers New Tools in LEGO Fortnite
You can give villagers new tools by going up to them, hitting ‘X’ or ‘Square’ or ‘Y’ to speak to them, and selecting the ‘Take this!’ dialogue option. Doing so will prompt you to give an item of its corresponding type from your inventory. This includes basic tools like:
- Pickaxe
- Forest Axe
- Shortsword
I have noticed that doing this carefully can benefit you and allow them to help you more efficiently in gathering and combat. They can even carry multiple items. But if their gear ever breaks, they’ll fight like a true champ when you need to be defended from mobs like skeletons that emerge at night. Giving your villager tools will help, such as in finding helpful resources like shells from rollers in LEGO Fortnite, so always be mindful of that when making new gear.
Related: How to Get XP in LEGO Fortnite
Now that you know Villager Tools do break in the game, you can keep a close lookout for any broken pickaxe symbol in LEGO Fortnite or other tool breaks.
]]>Take the Bomb King, for example, which is tied to a side quest called “Weird Science.” The hint for this hunt is to venture to The Crock. If you’re stuck and can’t seem to find this well-hidden monster — you have come to the right place. This guide will cover the Bomb King Hunt location and where to find the Crock in Final Fantasy 16.
The Crock Location for the Bomb King Hunt in Final Fantasy 16
Players can find The Crock Sanbreque and the Bomb King’s location in Final Fantasy 16 in the southeast area of the Sanbreque region. The quickest way to get to the Crock Sanbreque is to fast-travel to the Dragon’s Aery Obelisk — where you must proceed south from its location. Refer to the image attached to this guide, where my marker represents where The Crock Sanbreque and the Bomb King are located.
Once you approach this area, you will notice an area that resembles a coliseum. Head inside this coliseum, and a short cutscene will begin. This is when the Bomb King will appear, and the battle will commence.
Related: FFXVI Breaker of Worlds Hunt Location: Where to Find the Fallen Giant in the Rosarian Ruins
How to Beat the Bomb King in Final Fantasy 16
The Bomb King of the Crock Sanbreque falls into the Rank B category, making it one of the easier of the Notorious Marks. Still, it would be wise to prepare for this fight by stocking up on potions and hi-potions by purchasing them from the Merchant in the Hideaway. Also, check to see if there are any available upgrades for your weapons and armor at the Blacksmith.
The Bomb King fight in the Crock Sanbreque is straightforward until the enemy reaches about half its HP. This is when the Bomb King will start summoning smaller versions of itself, which will begin to explode and cause severe damage. I had the best luck at this part by evading these smaller enemies and focusing on the Bomb King the entire time — to avoid the explosive attacks that the Bomb King’s summons are there to do. If you are having trouble, practice in training mode!
Related: How to Get Electrum in Final Fantasy 16
After beating The Bomb King of the Crock Sanbreque, you will be rewarded with 20 Renown, 9,000 Gil, and Bomb Ember (a rare crafting material.) You can use the Renown by heading to the Patron’s Whisper near the Hunt Board, where you can collect items depending on the amount of Renown you have in your inventory.
Is the Bomb King Missable in Final Fantasy 16?
Technically, the Bomb King and all other hunts are missable as there is a point very late on in the game where you aren’t allowed to return to the open world. However, if you make frequent saves, you will always be able to go and get this notorious hunt mark. In my opinion, It is highly worthwhile to track this mark down as soon as it is on the board.
Related: Can You Upgrade Purple Weapons in Final Fantasy 16?
It is especially useful for getting the Bomb Ember material and, of course, the free 9000 Gil, as mentioned before. All in all, make sure to complete this particular notorious mark in the game!
How to Unlock the Bomb King Hunt in Final Fantasy 16
The Bomb King of the Crock Sanbreque can be unlocked once players complete the quest “Letting off Steam III,” which is part of the main quest “Out of the Shadow.” Once you complete the quest, you must then start the “Weird Science” side quest, which Owain, the Engineer in the Hideaway, provides. Once you begin the Weird Science side quest, the Bomb King will become available on the Hunt Board at the Hideaway. If you are still looking for the Hunt Board, know it is on the area’s western side.
It’s important to remember that Hunts (Notorious Marks) progressively unlock as you play through the main story. Some also revolve around side quests, similar to the Bomb King of Crock Sanbreque, so if you ever have trouble unlocking one, just make sure you speak to everyone with an exclamation point above their head.
NPCs with question marks have a side quest available, and sometimes, they involve hunting down a Notorious Mark. I highly recommend you complete as many objectives from the Hunt Board as possible, as the rewards are extremely valuable and can help you as you approach the end game.
Related:FFXVI Belphegor Hunt Location: Where to Find The Broken Hilt in Rosaria
Weird Science Side Quest Rewards
Completing the Weird Science side quest and reporting back to Owain will reward you with some valuable rewards. For example, you will receive the Treated Potion Satchel, which allows you to increase the amount of potions you can carry. Having an extra potion saved me numerous times against the end-game bosses.
Additionally, you will receive 1 Black Blood, 900 EXP, and 40 Renown. With all those rewards in mind, it’s safe to say that completing Weird Science and defeating the Crock of Sanbreque is worth it.
History of the Bomb King in Final Fantasy
The Bomb King of the Crock Sanbreque originally appeared in Final Fantasy IV, and it was only found in the Lunar Ruins dungeon, which was highly extensive — the dungeon was only available for the PSP and the Gameboy Advance editions of the title. The Bomb King has appeared in various forms since its first appearance.
Related: How to Use Heatwave in Final Fantasy 16
I find it intriguing that the Bomb King was a “Notorious Monster” before in Final Fantasy XI, so Final Fantasy XVI is carrying on that legacy. Bombs have been around in Final Fantasy since the franchise’s second installment and have continued making their sometimes fiery selves known in players’ minds. Now that you know where the Bomb King is in Final Fantasy XVI, it’s time to go and battle it!
]]>We’ve webbed this guide together to help you earn Slack Line in Spider-Man 2’s post-game.
- How to Earn The ‘Slack Line’ Trophy in Spider-Man 2’s Post-Game
- How to Perform Stealth Takedowns from a Web Line in Spider-Man 2
- Is Spider-Man 2 Easy to Platinum
How to Earn The ‘Slack Line’ Trophy in Spider-Man 2’s Post-Game
The Slack Line Trophy in Spider-Man 2 requires you to perform stealth takedowns on 25 enemies from a Web Line. This is best done during the story’s many stealth segments, though with no way to replay them (yet), we’re going to need to get creative.
If you’ve beaten Spider-Man 2 but haven’t tackled all its optional activities, then challenging Hunter Bases and Hunter Blinds as Miles is your best bet for completing the Spider-Man 2 Slack Line Trophy post-game. Hunter Bases, in particular, are rich with enemies and opportunities for Web Line takedowns. I have personally found that you can easily get above ten stealth takedowns at some of these bases like the Motorpool if you are careful with how you approach tackling them.
Earning ‘Slack Line’ With 100% Completion
For fellow 100% completionists, this will be a little trickier but still completely manageable. Firstly, switch your Challenge Level (difficulty) to Friendly Neighbourhood and switch to Miles. This allows you to quickly dispatch Symbiotes and stealth away to take down human foes.

Look for Crimes in the city involving human enemies, like Hunters. Far easier said than done, I know. Take down any Symbiotes involved, then turn invisible and jump to high ground. Set up a Web Line and carefully take out opponents below by pressing Square when they’re marked as Safe.
I highly recommend picking up Web Line Double Takedown from the Shared Skill Tree, as you can pick up two enemies simultaneously. That’s an extra takedown and far less chance of being spotted again.
How to Perform Stealth Takedowns from a Web Line in Spider-Man 2
To create a Web Line in Spider-Man 2, hold L2 while perched on the edge of a building or platform and press Triangle while pointing at a surface. For example, between two buildings or from a roof to a lamp post.
If you can’t get into a good spot for a takedown, you can use a Web Line as a starting point for another Web Line, just like a Spider would build its web. To perform a Stealth Takedown from a Web Line, press R3 to check if an enemy is Safe, then press Square when they’re in range.
If finding enough enemies to perform stealth takedowns on is proving too much — and I totally get why it would be — then you can always wait for the upcoming New Game Plus update.
Is Spider-Man 2 Easy to Platinum?

Yes, Spider-Man 2 is easier than a lot of games to platinum thanks to the fact that you can’t miss any of the trophies during your playthrough. This means that you will always be able to swing back through the city at any point and collect whichever trophies you still need to get. It won’t take you too long to platinum either, if you’re playing the game on and off for a week after the story completion, you should have the platinum in no time.
Getting this platinum trophy will be even easier now that you know how to get the Spider-Man 2 Slack Line trophy post-game much simpler.
This guide was written while playing Marvel’s Spider-Man 2 on PlayStation 5.
]]>Here’s how to activate Deadbolt Turrets with ammo mods in MW3 Zombies!
- How to Activate 3 Deadbolt Turrets in MW3 Zombies
- How Do You Get the Deadbolt Turret Circuits in MW3 Zombies
- How to Do You Complete Automated Backup in MW3
- What is the Best Turret Circuit Mod in MW3 Zombies
How to Activate 3 Deadbolt Turrets in MW3 Zombies
To activate the 3 Deadbolt Turrets in MW3 Zombies, you’ll need to approach one as marked on the map, hold ‘Square’ or ‘X’, and press down on the D-pad to select a Turret Circuit. This will activate them to use against the surrounding zombies, and they work with killer efficiency if you’re looking to clear some breathing room on the map. Additionally, they can be modded with special ammo to spice things up.
Related: MW3 Zombies Saboteur Guide: How to Get Uncommon Aether Tool Plans
I believe it’s always worthwhile using Deadbolt turrets when you can, especially when things start to get a lot more heated as time goes on. The trickiest part is the process of gathering the materials needed to start up the turrets.
How Do You Get the Deadbolt Turret Circuits in MW3 Zombies
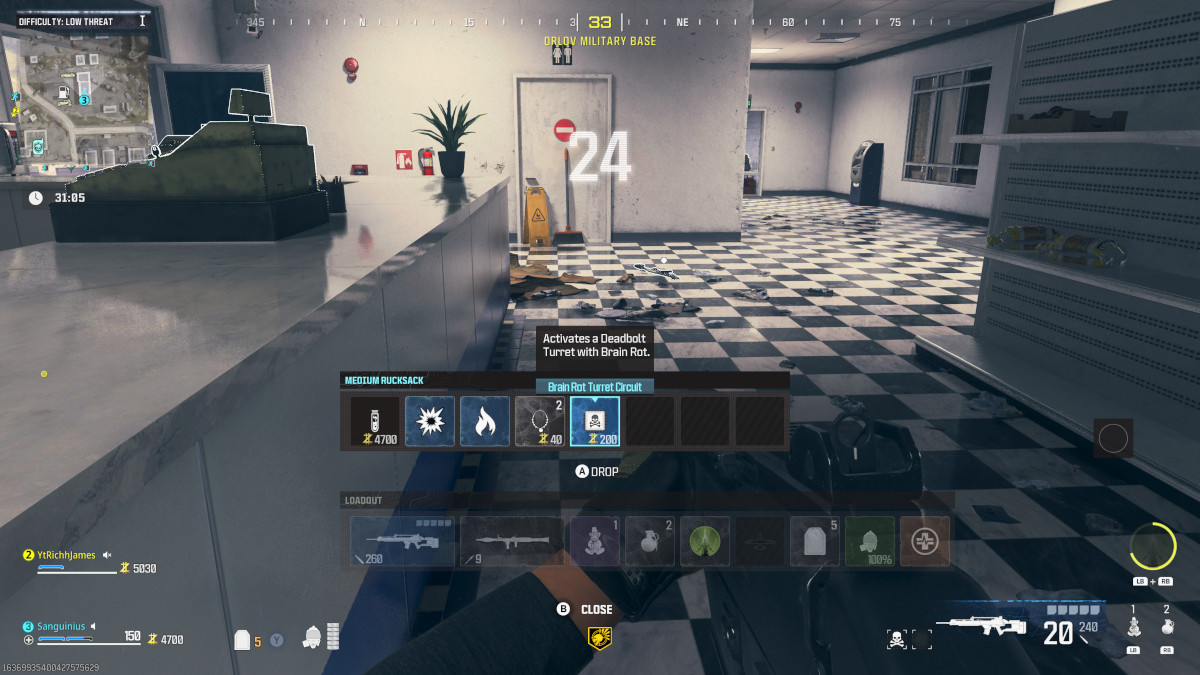
You can find Turret Circuit Boards commonly at Mercenary Encampment caches and even more frequently at Mercenary Strongholds. I’ve often been able to find one or two boards at each of these locations, making this one of the easier mechanics to pick up and play. However, if you’re planning on going into Mercenary Strongholds, I recommend being prepared with the appropriate gear.
Make sure you have armor stocked up along with a pack-a-punched weapon if at all possible. The strongholds are excellent for getting loot and the circuit boards needed, but be careful if you’re by yourself.
How to Complete Automated Backup in MW3
To complete Automated Backup, you only have one objective:
- Activate 3 Deadbolt Turrets with Ammo Mod Circuit Boards
While this sounds easy, you’ll need the ammo mod boards, and plain Turret Circuits won’t cut it. So anything like Cryo Freeze or Brain Rot Circuit Boards as shown in the above section are the only ones that will count toward this objective. After you have what you need, you can get the 3 Deadbolt Turrets active and complete the mission.


I tested this out myself, and while it was disappointing that you need these special boards, it’s one of the missions with the least amount of tedious or meticulous work (looking at you, Hellhounds objective in Freezer Burn).
Top recommendations for specific ammo mods for these turrets are largely Brain Rot and Cryo Freeze, with good chances of these being pulled off and curbing the hordes surrounding you. Brain Rot is especially good at turning the threats against themselves, saving you time, HP, and ammo.
What is the Best Turret Circuit Mod in MW3 Zombies
I personally enjoy using either Shatter Blast or Dead Wire for the ammo mod applied to Deadbolt turrets. The Shatter Blast in particular can be beautiful for watching it in action thanks to the explosive nature of the mod.
Related: MW3 Zombies Big Bounty Locations: Disciple, Mangler, and Mimic
No matter which one you decide upon, there will still be an advantage given to you over the regular ammo, so be sure to stock up on the ammo mods when you can. Now that you know how to activate 3 Deadbolt turrets in MW3 Zombies, it’s time to begin the process for yourself and gain even more experience points.
]]>This guide will tell you whether you should take the Dagger of Shar in Baldur’s Gate 3.
What Happens if You Take the Dagger of Shar in Baldur’s Gate 3?
I recommend that you don’t take the Dagger of Shar if you don’t need a magic dagger. Doing so will spawn three very powerful enemies, each at level 7 with 120 HP. That said, if you have a rogue or another character who can benefit from a magic dagger, you should take the Ritual Dagger of Shar.
While not the best dagger in Baldur’s Gate 3, it’s a more than decent weapon at this point of the campaign. It’s a +1 Uncommon weapon that deals 1d4+1 piercing damage plus an additional 1d4 Necrotic Damage. Since it’s a magic dagger, throwing it at an enemy makes it return to your hand immediately after the attack.
Where to Find the Ritual Dagger of Shar in Baldur’s Gate 3
You can find the Ritual Dagger of Shar in the Shadowlands during Act 2. After making your way to the end of the Sharran Sanctuary of the Cursed Lands and passing the three skill checks for a secret door, you will come across the Dagger of Shar. You then can take the Dagger of Shar from its pedestal and add it to your inventory.
I have found that you will have to be extremely careful with the enemies around the area. Considering that you will most likely be at this point in the game with low-level characters, you’re setting yourself up for failure right from the start.
Related: Should You Release the Pixie in Baldur’s Gate 3?
Not only are these enemies tough, but they also take almost zero damage. They all have the Shadow Condition, which makes them resistant to all damage that isn’t Force, Psychic, and Radiant. So unless you’re prepared for that specific type of battle, I would avoid it altogether. Instead, feel free to grab other items surrounding the Dagger of Shar while you’re in this area.
Sacrifice Blood at the Altar
In the Sharran Sanctuary, besides having the chance to steal the dagger, you can also sacrifice blood to the Altar. This is an intelligent choice, as doing so will improve your relationship with Shadowheart. Additionally, you will be rewarded with scrolls and potions to help you on your adventure.
To sacrifice blood to the Altar, all you need to do is approach the Altar and interact with it. Then, choose to offer blood using the Ritual Dagger on the bowl. It’s that easy! Now that you know if you should take the Dagger of Shar in Baldur’s Gate 3, you can jump into the game again and make the choice.
]]>This article will take you through all the Shuro Chi Wish Wall Solutions in Destiny 2.
- All Destiny 2 Wish Wall Solutions
- Wish One — Shuro Chi Teleport
- Wish Two — Hope for the Future by Paul McCartney
- Wish Three — Failsafe Dialogue
- Wish Four — Explosive Celebration Headshots
- Wish Five — Last Wish Raid Emblem
- Wish Six — Ethereal Key
- Wish Seven — Traveler Head
- Wish Eight — Corrupted Egg Spawns
- Wish Nine — Spawns Chest Between Morgeth and The Vault
- Wish 10 — Morgeth Encounter Teleport
- Wish 11 — Vault Teleport
- Wish 12 — Riven Encounter Teleport
- Wish 13 — Drifter Dialogue
- Wish 14 — Hardest Difficulty of Raid (Extinguish Mode)
- Where to Find the Last Wish Raid’s Wish Wall
All Destiny 2 Wish Wall Solutions
All wishes can be entered in any order you would like, as there is no set pattern to them. I recommend just going for the wishes you want to use the most. Usually, the Shuro Chi teleport for the Last Wish raid is used a lot as it is an excellent farming spot, which is why it’s common for the wall to be known as the Shuro Chi Wish Wall.
To activate a wish, shoot the circles to match the images and then step on the glowing circle on the floor.
Related: Destiny 2 Altars of Summoning Feeble, Robust, and Powerful Offering, Differences Explained
Wish One — Shuro Chi Teleport
Up first, this is the pattern you will need to enter for an immediate teleport to the Shuro Chi encounter. It takes quite a while to set up I have found but it is very worthwhile.
Wish Two — Hope for the Future by Paul McCartney
This pattern will have Destiny 1 nostalgia flooding back to players like myself. When you enter this and step on the floor pad, “Hope for the Future” by Paul McCartney will play for a short time.
Related: Destiny 2 Supercluster God Roll: Best PVE and PVP Perks
Wish Three — Failsafe Dialogue
This will unlock some Failsafe Dialogue for you to listen to throughout the raid. Since you likely won’t have heard from this character for a while like I hadn’t, this can be a nice surprise.
Wish Four — Explosive Celebration Headshots
Whenever you get headshots on enemies with this wish active, there will be an explosive celebration which is very close to the Grunt exploding heads from Halo.
Wish Five — Last Wish Raid Emblem
The pattern above will unlock the fancy Last Wish emblem which I personally used for a long while in the game.
Related: Is the Destiny 2 x PlayStation Armor Collab PlayStation Exclusive?
Wish Six — Ethereal Key
You will get given an Ethereal Key for activating this wish. It can be used for the final chest after defeating Riven.
Wish Seven — Traveler Head
This wish is purely aesthetic, but it will place a massive Traveler onto the head of your character, which is hilarious to look at.
Wish Eight — Corrupted Egg Spawns

The above wish spawns corrupted eggs throughout the Last Wish raid.
Related: Destiny 2 Tigerspite God Roll: Best PVE and PVP Perks
Wish Nine — Spawns Chest Between Morgeth and The Vault
The ninth wish listed here will spawn a chest, which is situated between the Morgeth encounter and the vault, for you to open. You will need a Glittering Key to open the chest.
Wish 10 — Morgeth Encounter Teleport
A simple wish that will let you teleport to the Morgeth encounter of Last Wish.
Related: All Season of the Wish Secret Triumphs in Destiny 2
Wish 11 — Vault Teleport
Another teleport wish is this one, which will let you go to the Vault. I recommend using an Auto Rifle (or Trace Rifle) while shooting the wish wall so it is easier to change the pattern circles.
Wish 12 — Riven Encounter Teleport
This wish will teleport you and your fireteam to the final boss of Last Wish, known as Riven. This is perfect for those wanting just to clear the raid as quickly as possible.
Related: How to Fix Baboon Error Code in Destiny 2
Wish 13 — Drifter Dialogue
Similar to the Failsafe dialogue wish, this will let you hear dialogue from the charismatic Drifter while playing the raid.
Wish 14 — Hardest Difficulty of Raid (Extinguish Mode)
Finally, Wish 14 will activate what players know as the hardest difficulty for Last Wish, known as Extinguish mode. If any player is eliminated during the raid, you will all be taken back to orbit.
There is a 15th wish, but it does not do anything for the player apart from a story mission, so I have decided to leave this out as you get help creating the wish.
Where to Find the Last Wish Raid’s Wish Wall
It isn’t too difficult to find the Shuro Chi Wish Wall as it is close to the very start of the raid. Proceed as normal at the beginning until you reach Kali’s door. Don’t go in the door. Instead, go to the left-hand side rocky area. Jump around the cliffside and then get up onto the small vegetation-filled platform. From there, climb up to the top and jump across the gap.
Follow the path through and you will now be at the wish wall ready to input the codes. This will let you reap all the rewards from the wall in Destiny 2.
]]>This article will take you through a full leveling guide for Fisher in Final Fantasy XIV with some tips and tricks for getting your levels up quicker.
Best Way to Level Fisher in Final Fantasy XIV
After you’ve logged into a server, got your Fisher job unlocked, and have some bait, you will be ready to start the leveling process. For those unsure how to obtain the Fisher job, you first have to visit N’nmulika in Limsa Lominsa. She is the Fishermen’s Guild receptionist and can be found at X:7.8, Y: 14.3 in the city.
The unlock quest is specifically named “Way of the Fisher,” which you can get from her. Before getting into the main leveling strategies, having your character on a Preferred world for the Fisher leveling is extremely helpful as you will receive double XP from every source until you are level 80.
Related: FFXIV: How To Remove Sprout Status
Fisher Leveling Strategy 1-20
In my opinion, one of the easiest methods for leveling to 20 is by completing fisher job-specific Levequests throughout the world. These reward a great deal of experience points, and for a starting Fisher, your level will skyrocket before you know it.
An example of where to get Fisher Levequests is Wyrkholsk at the Red Rooster Stead in Lower La Noscea found at X:31.4, Y: 20. These will set you on your way to gaining more levels. Generally, fishing in water bodies and simply completing these quests will be the simplest way for 1-20.
Fisher Leveling Strategy 20-40
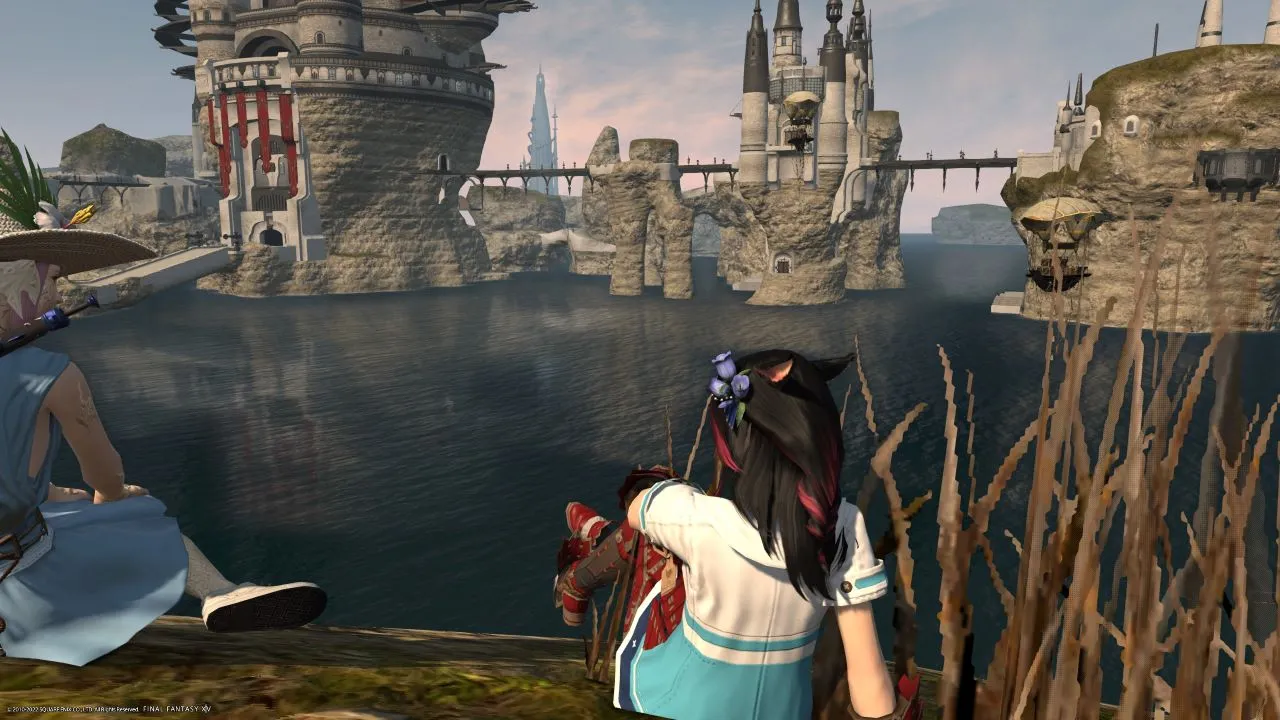
Once you have gotten a great bearing on how the Fisher job works after reaching level 20, you can continue onwards with your path up to 90. For the next chunk of levels, I still recommend completing some Levequests, but you can also combine these with using Commercial Survival Manuals bought from Scrip Exchange vendors, for example.
Related: The Best Food for Every Job in Final Fantasy XIV
The survival manuals will give you a 150% experience boost for around 18 hours, so they can be highly effective with fishing and completing the Levequest requirements.
Fisher Leveling Strategy 40-60
Up next is where things start to take a little longer to progress with the levels. The Diadem is your best option for leveling at this stage. You don’t need to do anything specific within the Diadem, but you can fish and there is a lot to catch, meaning easier experience. Of course, you may want to use a Survival Manual or some food for an exp boost.
Alternatively, you could do some Ocean Fishing instead if you prefer, which can be played by going to the Limsa Lominsa docks and waiting for a fishing run to commence. You will need to sign yourself up for the next ship, which can be done by speaking to Dryskthota (X: 3, Y: 12.7) on the docks.
Fisher Leveling Strategy 60-90
Finally, for the last push to 90, I would say to focus on Ocean Fishing as the runs always are very effective at rewarding you with a lot of experience if you are successfully catching fish. Plus, sometimes when Ocean Fishing, you will encounter a “Spectral Current,” which is incredible for gathering even more fish and more experience points.
Related: FFXIV Allied Seals Farming Guide
Now that you know the best way to level Fisher in Final Fantasy XIV, you can prepare your bait and dive back into the waters with your line to make those catches.
]]>Since you need to use attachments for certain challenges, I know how important it is to have the most effective ones. This article will take you through all Modern Warfare 3‘s hidden armory unlocks.
Every Modern Warfare 3 Hidden Armory Unlock
The armory unlocks listed below may be unlocked when leveling up particular guns/completing related challenges, but there are strange glitches/predicaments with some of the “hidden” armory unlocks — at least for the time being. Players on Reddit and across the community have been working out the general list of found unlocks. This is the most up-to-date version currently with assistance from the community discoveries.
| Weapon/Type | Armory Unlock |
|---|---|
| .300BLK Ammo Type (On Weapons which have it) | Blackout Low Grain Blackout Mono Blackout High Grain Blackout Round Nose |
| .45 Pistols | .45 Auto AET (on the Striker) |
| .50 Pistols | .500 AET .500 High Grain .500 Low Grain .500 Hardened |
| 7.62×51 mm and 7.62×54 mmR | 7.62x51mm Round Nose 7.62x51mm Mono 7.62x54mmR Hollow point 7.62x54mmR Armor Piercing 7.62x54mmR Frangible 7.62x54mmR Overpressured 7.62x54mmR Tracer 7.62x54mmR High Velocity |
| Pistols (9mm) | 9mm AET (on the WSP Swarm) |
| BAS-B | .227 High Velocity |
| Bruen MK9 | Bruen Mk9 bipod |
| DG-58 LSW | 5.8×42 Hollow point 5.8×42 Tracer |
| DG-58 | 5.56 NATO Tracer DG-58 Micro Barrel 5.56 NATO Overpressured |
| FJX Imperium | .408 Pace High Grain .408 Pace Mono .408 Pace Low Grain .408 Pace Round Nose |
| Holger 26 | Houndeye Integrated Optic (Holger 26 lvl 7) |
| KV Inhibitor | .338 Magnum Armor Piercing Rounds .338 Magnum Hollowpoints .338 Magnum Overpressured .338 Magnum Frangible .336 Magnum Incendiary .338 Magnun Round Nose |
| Large Muzzles | ELR Blackfire Compensator L (on the KVD Enforcer) |
| Optics | Demonic Call Xten Intlas AS-7 (Note: This keeps showing as locked) Nydar M2023 SZ HM5 |
| MCW 6.8 | 6.8 Wrath Hollow point 6.8 Wrath Armor Piercing RB Crotalus Assault Stock 6.8 Wrath Frangible 6.8 Wrath Overpressured 6.8 Wrath Round Nose 6.8 Wrath Spire Point 6.8 Wrath High Velocity 6.8 Wrath Incendiary 6.8 Wrath Tracer |
| RAAL Lmg | .338 MAG Round Nose |
| Sidewinder | 450 Huntsman Frangible 450 Huntsman Tracer 450 Huntsman Armor Piercing 450 Huntsman Overpressured 450 Huntsman Hollow point 450 Huntsman High Velocity |
| TYR | 12.7x55mm Hardened 12.7x55mm Snake Shot 12.7x55mm AET |
Related: MW3 Mission List: How Long is the Modern Warfare 3 Campaign?
As can be seen, there is a great number of these unlocks, so any player trying to easily get them will no doubt be confused as to why they can’t see them in the general armory unlock section, either.
What are Hidden Armory Unlocks in Modern Warfare 3?

Hidden armory unlocks is a phrase coined by the community but are attachments that are hidden away in the gunsmith menu of certain weapons. Usually, certain attachments will have an armory unlock challenge in the main section, but everything listed above does not work like that, so I know that will cause a lot of confusion. Thankfully, the list will be a good way to keep track of which were the hidden ones.
Related: How to Unlock BBQ in Modern Warfare 3
Now that you know all of the hidden armory unlocks in Modern Warfare 3, you can go through your weapons and check if you have them unlocked.
]]>This article will take you through how to go AFK in GTA Online without getting kicked from the servers.
How to Go AFK in GTA Online Without Leaving
There are a few methods that will allow you to go AFK in GTA Online, but one of the simplest is one of the oldest tricks in the book. For console players, or for those who use controllers on PC, you can simply put a rubber/elastic band around the aim button (left trigger default) of your controller. Or have it around your movement sticks.
Related: Where to Buy the Battle Rifle in GTA Online
I recommend doing any of these methods within a space such as your apartment or the Diamond Casino so you are not being a nuisance to any other players. If you are on PC then you can plug a controller in and still be able to get the same effect from the rubber bands.
Is There Any Risk Going AFK in GTA Online With This Method?
No, there are no major risks for going AFK in GTA Online with this method and I haven’t noticed any bans as of yet relating to doing this. I personally haven’t gone AFK without being kicked, but for those who would like to, you should be safe to do so. The main risk is hardware-related as you won’t want to have a rubber band on your controller for too long so you don’t damage it.
Related: GTA Online Drift Tuning Guide: How to Drift and All Supported Cars
Now that you know how to go AFK in GTA Online, you can take some rest before you dive back into making money at the Salvage Yard if you are planning to.
]]>This article will take you through exactly how to collect an item inside a thrown present by Sgt. Winter in Fortnite.
Location of Sgt. Winter in Fortnite
Sgt. Winter can be found to the very north of the map on the small island to the northwest of Classy Courts. I recommend just gliding down to that area after jumping out of the bus. It is a very simple quest once you know where you’re supposed to be going. However, be careful of other players as they may be planning the same strategy and could end up eliminating you early on in a match.
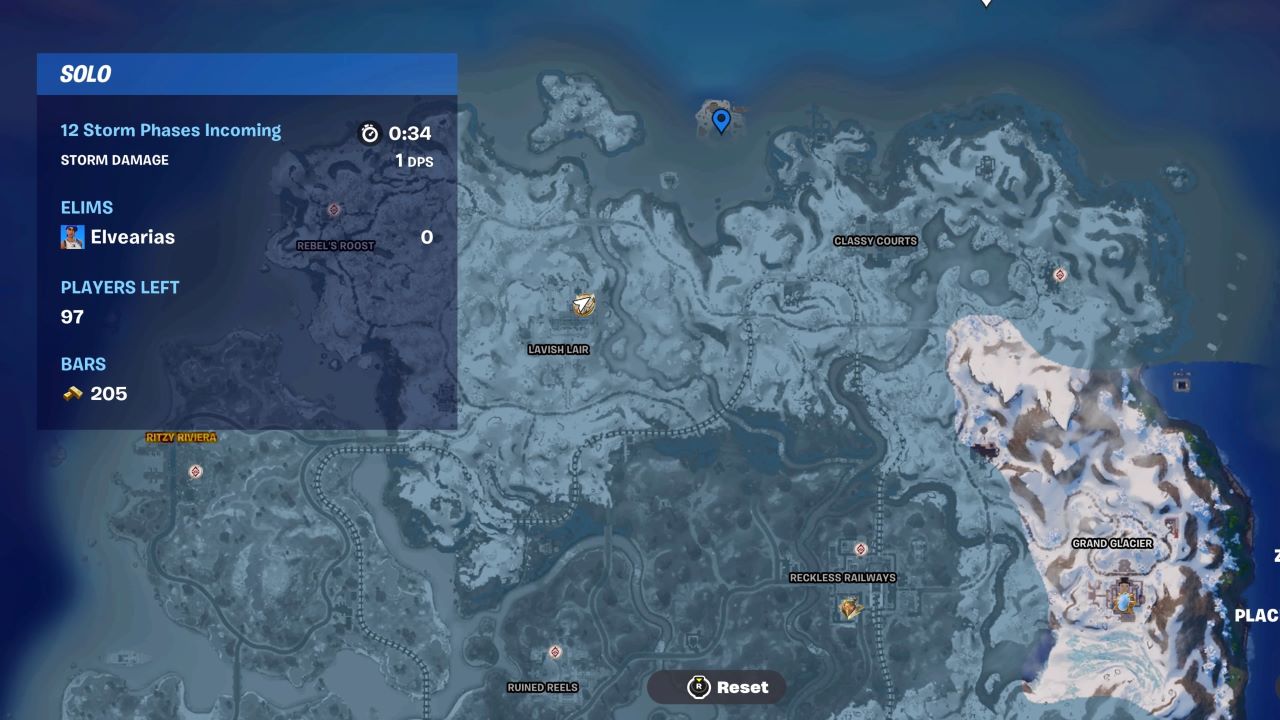
Related: How to Hurdle in Fortnite
Once you have landed, walk up to the muscular NPC patrolling the area, Sgt. Winter. He will ask if you’ve been naughty or nice then will throw a small present on the ground. This suddenly turns into a massive present and after that has happened, you are ready for the next part of the quest.
How to Collect an Item Inside a Thrown Present in Fortnite
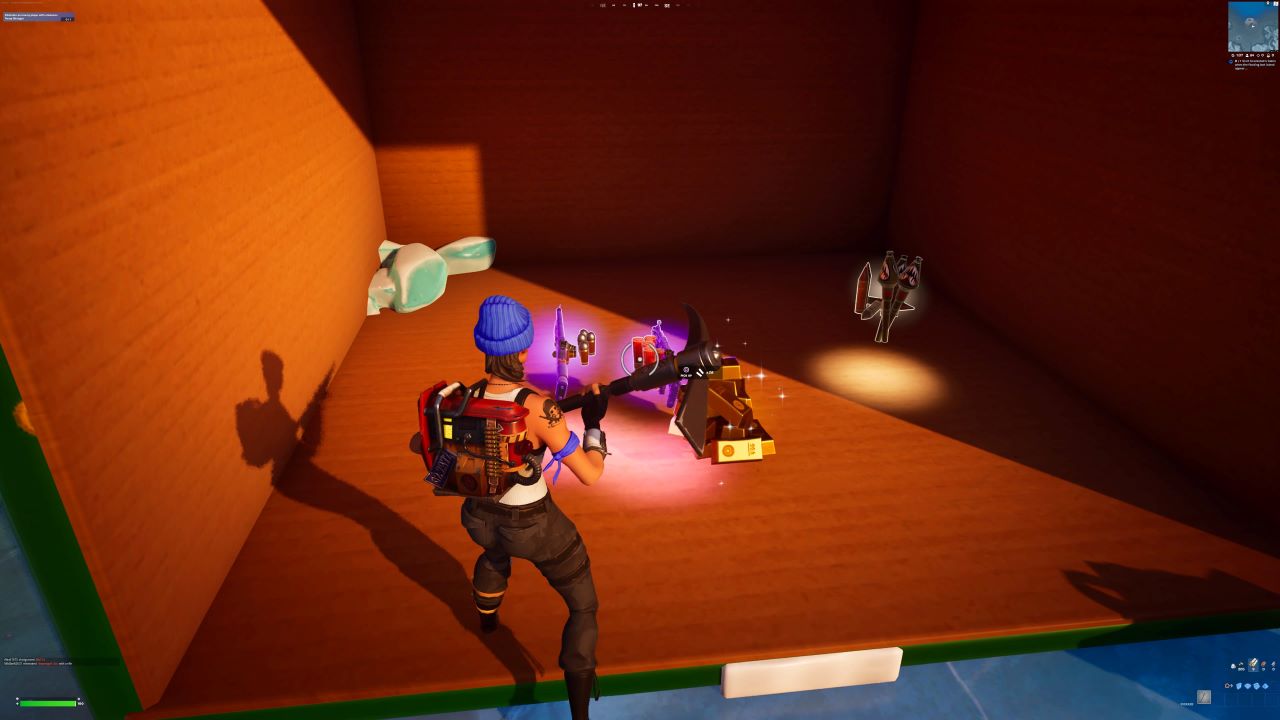
To collect the item when the present is thrown to you, all I had to do was break open the present with your pickaxe or via a similar means. Once you have, the box will open up and you can go inside to collect all of the loot waiting for you. The quest will then be completed and you can go back to the usual round of Fortnite.
Now that you know how to collect your items inside the thrown present, you can make your way down to the icy island and do it for yourself — best of luck!
]]>